Unlock the Secrets to Transforming Wood Furniture with Stain
Title: A Comprehensive Guide to Staining Wood Furniture: From Basics to Expertise
Introduction:
Staining wood furniture is an excellent way to enhance its natural beauty, add depth, and protect it from wear and tear. Whether you’re a DIY enthusiast or a beginner, this comprehensive guide will take you through the step-by-step process of staining wood furniture, starting from the basics and gradually building up your expertise.
Section 1: Understanding Wood Staining
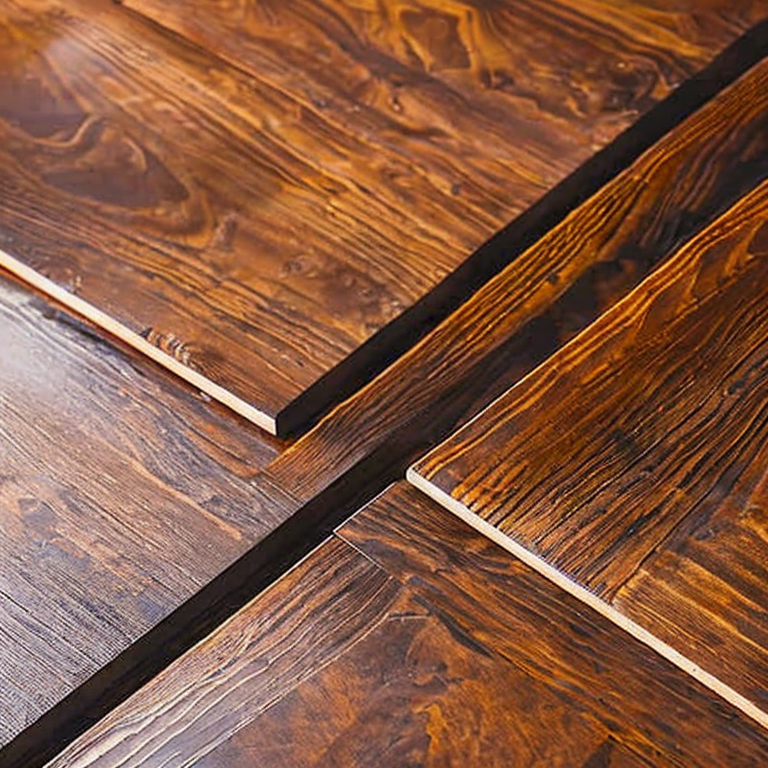
1.1 What is wood stain?
Wood stain is a colored liquid that penetrates the wood’s surface, enhancing its natural grain patterns while adding color and protection.
1.2 Why stain wood furniture?
Staining wood furniture offers several benefits, including:
– Enhancing the natural beauty of wood by highlighting its grain patterns.
– Adding color and depth to create a personalized look.
– Protecting the wood from moisture, UV rays, and general wear and tear.
– Increasing the longevity of your furniture.
Section 2: Preparation
2.1 Choosing the right stain:
Start by selecting a stain that suits your desired color and finish. Stains are available in various shades, from light to dark, and in different types, including oil-based, water-based, and gel stains.
2.2 Gathering the necessary tools and materials:
To get started, you will need:
– Wood stain
– Sandpaper (in various grits)
– Clean, lint-free rags
– Drop cloths or plastic sheets
– Painter’s tape
– Paintbrushes or foam brushes
– Protective equipment (gloves, goggles, and a mask)
2.3 Preparing the workspace:
Ensure you have a well-ventilated area with ample space to work. Lay down drop cloths or plastic sheets to protect the floor or work surface from any accidental spills or stains.
Section 3: Prepping the Wood
3.1 Cleaning the furniture:
Thoroughly clean the wood surface using a mild detergent and water solution. Remove any dirt, dust, or grime accumulated over time. Rinse with clean water and allow it to dry completely.
3.2 Sanding the wood:
Using sandpaper with a medium grit (around 120-150), sand the entire surface of the furniture in the direction of the wood grain. This step helps remove any existing finish, smooth out imperfections, and open up the wood pores to absorb the stain more effectively. Gradually progress to finer grits (220-320) for a smoother finish.
3.3 Removing dust:
After sanding, use a clean, dry cloth or a tack cloth to remove any sanding residue or dust particles. Ensure the surface is completely clean before proceeding to the staining process.
Section 4: Applying the Stain
4.1 Testing the stain:
Before applying the stain to the entire furniture piece, conduct a test on a small, inconspicuous area to determine the desired color and the stain’s compatibility with the wood.
4.2 Applying the first coat:
Stir the stain thoroughly to ensure an even distribution of color pigments. Using a brush or foam brush, generously apply the stain in the direction of the wood grain. Allow the stain to penetrate the wood for the recommended time mentioned on the product label.
4.3 Wiping off excess stain:
After the recommended time, use a clean cloth to gently wipe off any excess stain. Ensure you follow the grain of the wood while wiping to maintain a consistent appearance.
4.4 Evaluating the color:
Once the stain has dried (usually within 24 hours), evaluate the color of the first coat. If you desire a darker shade, repeat the staining process by applying additional coats, allowing drying time and wiping off the excess between each coat.
Section 5: Finishing Touches
5.1 Applying a protective finish:
To protect the stained wood furniture and enhance its durability, apply a clear protective finish. Options include polyurethane, lacquer, or varnish. Follow the manufacturer’s instructions for application and drying times.
5.2 Sanding between coats:
If applying multiple coats of protective finish, lightly sand the surface between each coat using fine-grit sandpaper. This step helps achieve a smooth and even finish.
5.3 Final inspection and assembly:
Once the protective finish has dried completely, inspect the furniture for any imperfections or rough areas. Make any necessary touch-ups or sanding corrections. Lastly, reassemble the furniture if it was disassembled during the staining process.
Conclusion:
By following these step-by-step instructions, you are now equipped with the knowledge to stain wood furniture like an expert. Remember to exercise patience and precision throughout the process, and enjoy the satisfaction of transforming ordinary wooden furniture into stunning pieces that reflect your personal style.
Unlocking the Secrets: Troubleshooting Wood Staining Woes!
Staining wood furniture can be a great way to enhance its natural beauty and give it a fresh new look. However, it’s not always a smooth process, and there are some common and uncommon issues that you may encounter. Here are a few of them along with some solutions, tips, and advice to help you achieve the best results:
1. Uneven color: One common issue is achieving an uneven color when staining. This can happen due to variations in wood grain or if the stain is not applied consistently. To avoid this, it’s important to prepare the wood properly by sanding it evenly. Apply a pre-stain conditioner to help the wood absorb the stain more evenly. Additionally, make sure to apply the stain in long, even strokes, following the direction of the wood grain.
2. Blotchy appearance: Sometimes, certain areas of the wood may absorb the stain more than others, resulting in a blotchy appearance. This is more common with softwoods like pine. To prevent this, consider using a wood conditioner before staining, which helps to seal the wood and promote even absorption. Another option is to use a gel stain, which tends to provide a more uniform color and is less likely to blotch.
3. Overlapping brush marks: If you’re using a brush to apply the stain, overlapping brush marks can create visible lines or streaks on the wood. To avoid this, work in small sections and always brush in the direction of the wood grain. Take care to blend each stroke with the previous one while the stain is still wet. If you notice any overlapping marks, lightly feather them out with a clean brush or cloth.
4. Drying too quickly: Stains can sometimes dry too quickly, especially in hot and dry conditions, making it difficult to achieve an even finish. To slow down the drying process, you can add a retarder to the stain or work in smaller sections to ensure you have enough time to blend and wipe off excess stain before it dries.
5. Color not as expected: Stain colors can look different on different types of wood. It’s essential to test the stain on a small, inconspicuous area before applying it to the entire piece. This allows you to see how the color will appear on the specific wood you’re working with. Additionally, consider using a sample board or scrap wood of the same species to experiment with different stain colors and achieve the desired look.
6. Wood grain not highlighted: If you want to highlight the natural wood grain, it’s important to choose the right type of stain. Transparent or semi-transparent stains are typically better suited for showcasing wood grain as they allow the natural patterns to shine through. Applying multiple coats or sanding lightly between coats can also help enhance the grain definition.
7. Stain not absorbing: Sometimes, the wood may not absorb the stain properly due to previous finishes, dirt, or oil on the surface. Ensure that the wood is clean and free of any existing finishes by sanding it thoroughly. If needed, use a wood stripper or sanding sealer to remove old finishes. This will help the stain penetrate the wood better and achieve more even results.
Remember, practice makes perfect when it comes to staining wood furniture. Don’t be discouraged if you encounter any issues along the way. With careful preparation, proper technique, and some experimentation, you can achieve beautiful, professional-looking results.
Unleash the Inner Artist: Mastering the Art of Staining Wood
For advanced users who are already experts in staining wood furniture, there are several other exciting projects that you can explore to further enhance your woodworking skills. Here are a few ideas and tips to consider:
1. Wood Inlay: Wood inlay involves embedding intricate designs or patterns into the surface of the wood. This technique requires precision and attention to detail. Start by selecting contrasting wood species and cutting them into thin strips or shapes. Then, carefully recess the design area on the main piece of wood and glue the inlay pieces into place. Sand and finish the piece to achieve a smooth, seamless look.
2. Veneering: Veneering is the process of applying thin layers of wood (veneer) onto a solid wood surface to create decorative patterns or add a different wood species to your project. This technique involves using specialized adhesive and tools such as vacuum presses or clamps to ensure proper bonding. Pay attention to grain direction and carefully trim excess veneer for a professional finish.
3. Wood Carving: Take your woodworking skills to the next level by incorporating wood carving into your projects. Whether it’s creating intricate patterns, sculpting detailed figures, or adding decorative elements, wood carving can truly elevate the aesthetics of your furniture. Choose the right carving tools and practice on scrap wood before working on your main piece. Patience and practice are key to achieving excellent results.
4. Bent Lamination: Bent lamination involves gluing together thin strips of wood to create curved or bent forms. This technique is commonly used to make chairs, tables, and other furniture with curved elements. To achieve successful bent laminations, carefully select wood species with appropriate flexibility, use high-quality glue, and ensure proper clamping pressure during the curing process.
5. Marquetry: Marquetry is the art of creating intricate designs by assembling thin pieces of wood veneer onto a solid wood surface. This technique requires meticulous cutting, fitting, and gluing of individual veneer pieces to form complex patterns or images. Consider experimenting with different wood species and grain patterns to achieve stunning visual effects.
Regardless of the advanced woodworking technique you choose, always practice on scrap wood first to refine your skills and gain confidence. Invest in quality tools, follow safety guidelines, and take your time to ensure precise execution. Remember, patience and attention to detail are crucial for achieving professional-looking results in any advanced woodworking project.
Tags: DIYfurniturestaining, furnituremakeover, furniturerefinishing, furniturerepair, furniturerestoration, furniturestaining, protectingwoodfurniture, stainapplication, stainingmethods, stainingsupplies, stainingtechniques, stainingtips, stainingtools, woodfinishing, woodfinishingproducts, woodfurniturecare, woodmaintenance, woodstain, woodstaincolors, woodstainingprocess
Tweet
Great article on how to stain wood furniture! I appreciate the clear and concise instructions provided. As someone who is patient and meticulous when it comes to working with wood, I found this guide to be extremely helpful.
The step-by-step approach outlined in the article ensures that even beginners like myself can achieve professional-looking results. I particularly liked the emphasis on proper preparation, such as sanding and cleaning the surface before applying the stain. It’s these little details that can make a big difference in the final outcome.
I also appreciate the tips on choosing the right type of stain for different wood furniture projects. Understanding the characteristics of various stains, such as oil-based or water-based, is crucial in achieving the desired finish. The explanation of different application techniques, such as wiping or brushing, further enhances my understanding and confidence in taking on my next staining project.
The inclusion of safety precautions throughout the article is commendable. It’s essential to prioritize personal safety and protect the environment when working with stains and chemicals. The reminder to work in a well-ventilated area and wear protective gear is a valuable reminder for both beginners and experienced woodworkers alike.
Overall, this article provides a comprehensive guide that satisfies my need for detailed instructions and explanations. It’s evident that the author has a deep understanding of the subject matter and a knack for explaining it in a way that is accessible to readers of all skill levels. I look forward to putting these tips into practice and transforming my wood furniture with a beautiful stain. Thank you for sharing your expertise!