Sweet Potato Perfection: Mastering the Art of Pureeing
Sure! I’d be happy to guide you through the process of pureeing sweet potatoes from scratch. By the end, you’ll be an expert in making delicious, creamy sweet potato puree!
Step 1: Choosing the Sweet Potatoes
When it comes to selecting sweet potatoes, look for ones that are firm, smooth, and have no soft spots or bruises. The color can vary from light beige to deep orange, depending on the variety. Both types are suitable for pureeing, so choose whichever you prefer.
Step 2: Cleaning and Preparing the Sweet Potatoes
Before starting, wash the sweet potatoes thoroughly under running water to remove any dirt or debris. You can use a vegetable brush to scrub the skin gently. Once they are clean, pat them dry with a kitchen towel.
Step 3: Peeling or Leaving the Skin
The decision to peel the sweet potatoes or leave the skin on is entirely up to you. Peeling the potatoes will result in a smoother texture, but leaving the skin can add extra nutrients and fiber. If you choose to peel them, use a vegetable peeler and remove the skin in thin, downward strokes.
Step 4: Chopping the Sweet Potatoes
After peeling (or deciding to keep the skin), it’s time to chop the sweet potatoes into evenly sized pieces. This helps ensure that they cook evenly. Aim for 1-inch cubes or smaller, as this will speed up the cooking process.
Step 5: Cooking the Sweet Potatoes
There are several cooking methods you can choose from:
Boiling:
– Place the chopped sweet potatoes in a large pot and cover them with water.
– Bring the water to a boil over medium-high heat and let the sweet potatoes cook for about 15-20 minutes or until they are fork-tender.
– Once cooked, drain the sweet potatoes in a colander and let them cool slightly before moving to the next step.
Steaming:
– Fill a pot with a few inches of water and place a steamer basket or colander on top.
– Add the chopped sweet potatoes to the steamer basket, making sure they are not touching the water.
– Cover the pot and bring the water to a boil over medium-high heat. Steam the sweet potatoes for approximately 15-20 minutes or until they are easily pierced with a fork.
– Remove the sweet potatoes from the steamer and let them cool slightly.
Microwaving:
– Place the chopped sweet potatoes in a microwave-safe dish.
– Add a little water to the dish to create steam.
– Cover the dish with a microwave-safe lid or microwave-safe plastic wrap, leaving a small vent for steam to escape.
– Microwave the sweet potatoes on high for 5 minutes, then check for doneness. Continue microwaving in 1-minute increments until the sweet potatoes are tender.
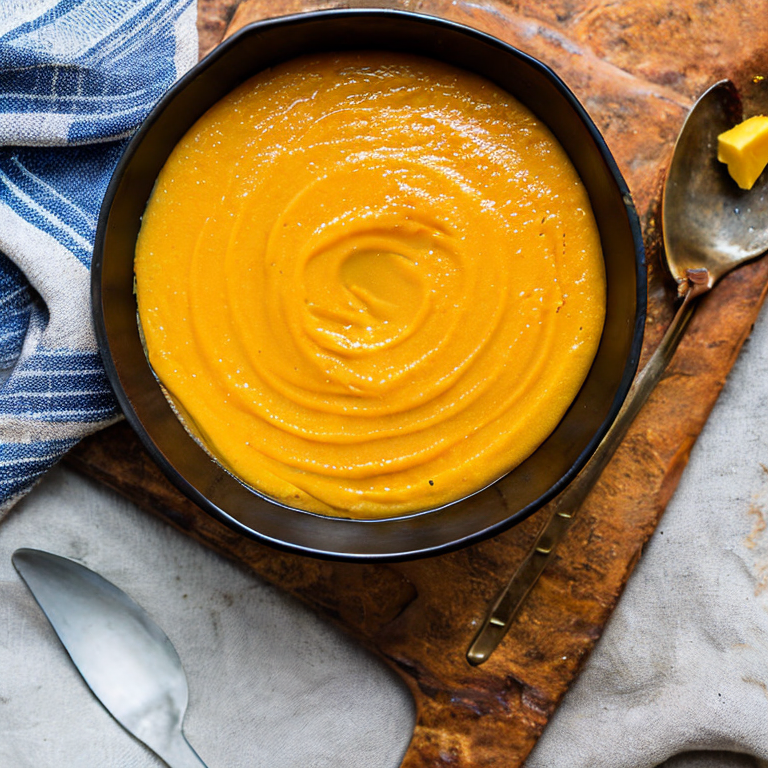
Step 6: Blending or Mashing the Sweet Potatoes
Once the sweet potatoes are cooked and slightly cooled, it’s time to transform them into a smooth puree. You have a few options for this:
Using a Blender:
– Transfer the cooked sweet potatoes to a blender or food processor.
– Blend the sweet potatoes on low speed at first, gradually increasing the speed to high. This will help break down any large chunks and create a creamy texture.
– If needed, you can add a small amount of liquid like water, milk, or vegetable broth to help with blending. Start with a tablespoon at a time until you reach your desired consistency.
– Scrape down the sides of the blender occasionally to ensure everything is well combined.
– Blend until you have a smooth and creamy puree.
Using a Hand Masher or Fork:
– Place the cooked sweet potatoes in a large bowl.
– Use a hand masher or fork to mash the sweet potatoes until they are mostly smooth. This method may result in a slightly chunkier puree compared to using a blender.
– If you prefer a smoother texture, you can also use an immersion blender directly in the bowl to achieve the desired consistency.
Step 7: Seasoning and Serving
Now that your sweet potato puree is ready, it’s time to enhance the flavors with some seasonings. Here are a few popular options:
– Sweeten the puree with a touch of honey, maple syrup, or brown sugar.
– Add a pinch of salt, a sprinkle of cinnamon, or a dash of nutmeg for warm, comforting flavors.
– For an extra kick, you can even add a pinch of cayenne pepper or a squeeze of lime juice.
Once you’ve seasoned the puree to your liking, it’s ready to be served! Sweet potato puree can be enjoyed on its own as a side dish, used as a base for soups or stews, or incorporated into various recipes like pies, muffins, or pancakes.
Congratulations, you are now an expert in making delicious sweet potato puree! Enjoy your culinary creations and feel free to experiment with different flavors and variations along the way.
Sweet Potato Puree Puzzles: Unveiling the Mashed Mysteries!
When it comes to pureeing sweet potatoes, there are a few common and uncommon issues that may arise. Let’s explore them along with some solutions, tips, and advice to ensure a smooth and successful pureeing process.
1. Common Issue: Chunky Texture
Solution: To achieve a smoother texture, make sure to cook the sweet potatoes until they are fully soft and tender. This can be done by either baking, boiling, or steaming them. Once cooked, allow them to cool slightly before pureeing to avoid steam buildup in the blender or food processor. Adding a liquid, such as water, milk, or vegetable broth, can also help achieve a smoother consistency.
2. Common Issue: Watery Puree
Solution: If your puree turns out too watery, it may be due to excess moisture in the sweet potatoes. To rectify this, drain any excess liquid after cooking or adjust the amount of liquid you add during the pureeing process. Alternatively, you can thicken the puree by returning it to low heat and gently simmering until some of the moisture evaporates.
3. Common Issue: Lumpy Puree
Solution: Lumps can occur if the sweet potatoes are not cooked thoroughly or if they are not mashed properly before pureeing. Ensure that the sweet potatoes are cooked until completely soft and then mash them well with a fork or potato masher before transferring them to a blender or food processor. This will help eliminate any lumps and result in a smoother puree.
4. Uncommon Issue: Bitter Taste
Solution: Occasionally, sweet potatoes can have a slightly bitter taste, especially if they are not fresh or have been stored for an extended period. To reduce the bitterness, choose fresh sweet potatoes and peel them before cooking, as the skins can sometimes contribute to the bitter flavor. Additionally, adding a touch of sweetness, such as a small amount of maple syrup or honey, can help balance out any unpleasant bitterness.
Tips and Advice:
– Choose sweet potatoes that are firm, smooth, and free from blemishes for the best results.
– Experiment with different cooking methods (baking, boiling, steaming) to find the one that yields the desired texture and flavor.
– Be cautious when blending hot ingredients, as steam can build up and cause the lid to blow off. Allow the sweet potatoes to cool slightly before pureeing or use a blender with a vented lid.
– Taste the puree before serving and adjust the seasoning as needed. You can add spices like cinnamon, nutmeg, or ginger for extra flavor.
– If you’re planning to freeze the puree for later use, allow it to cool completely before transferring it to freezer-safe containers or bags. Label and date them for easy identification.
By keeping these common and uncommon issues in mind, along with the provided solutions, tips, and advice, you can now confidently puree sweet potatoes to perfection. Enjoy the versatility and deliciousness of this nutritious root vegetable in various recipes!
Mashed Marvels: Elevate Your Sweet Potato Game with Advanced Techniques
For advanced users who are already experts in pureeing sweet potatoes, there are plenty of exciting projects and delicious recipes you can explore. Here are a few ideas to inspire your culinary creativity:
1. Sweet Potato Gnocchi: Take your pureed sweet potatoes to the next level by transforming them into homemade gnocchi. Combine the puree with flour, eggs, and seasonings to form a dough. Roll the dough into ropes, cut into bite-sized pieces, and cook in boiling water until they float to the surface. Serve with your favorite sauce or topping.
2. Sweet Potato Hummus: Blend your sweet potato puree with chickpeas, tahini, garlic, lemon juice, and spices to create a unique twist on traditional hummus. Enjoy it as a dip with pita bread or as a spread on sandwiches.
3. Sweet Potato Pancakes: Enhance your breakfast routine by incorporating sweet potato puree into your pancake batter. Simply mix the puree with flour, eggs, milk (or your preferred alternative), and a touch of cinnamon or nutmeg. Cook the pancakes on a griddle until golden brown and serve with maple syrup or your favorite toppings.
4. Sweet Potato Muffins: Add a nutritious twist to your baked goods by using sweet potato puree in muffin recipes. Replace some of the oil or butter with the puree, and adjust the sweetness accordingly. You can also incorporate complementary flavors like cinnamon, nutmeg, or even chocolate chips.
5. Sweet Potato Soup: Create a velvety and comforting soup by combining sweet potato puree with vegetable or chicken broth, onions, garlic, and your preferred seasonings. Simmer until all the flavors meld together, and garnish with toppings like croutons, herbs, or a drizzle of cream.
6. Sweet Potato Ice Cream: Yes, you read that right! Use your sweet potato puree as a base for a creamy and unique ice cream flavor. Mix the puree with heavy cream, sugar, and vanilla extract, and churn it in an ice cream maker according to the manufacturer’s instructions. The result will be a rich and flavorful frozen treat.
Remember, as an advanced user, you have the freedom to experiment and adapt recipes according to your taste preferences. Feel free to combine sweet potatoes with other ingredients you love, such as spices, herbs, or even different vegetables, to create your own signature dishes. Enjoy your culinary adventures!
Tags: antioxidants, cooking, delicious, easy, family-friendly, fiber, gluten-free, healthy, homemade, howto, mashed, mealprep, nutrients, puree, recipe, sidedish, sweetpotatoes, vegan, vegetarian, vitaminA
Tweet