Whip Up Your Taste Buds: Master the Art of Whipped Cream!
Certainly! I’d be happy to guide you through the process of making whipped cream from scratch. By the end, you’ll have a thorough understanding of the topic. Let’s get started!
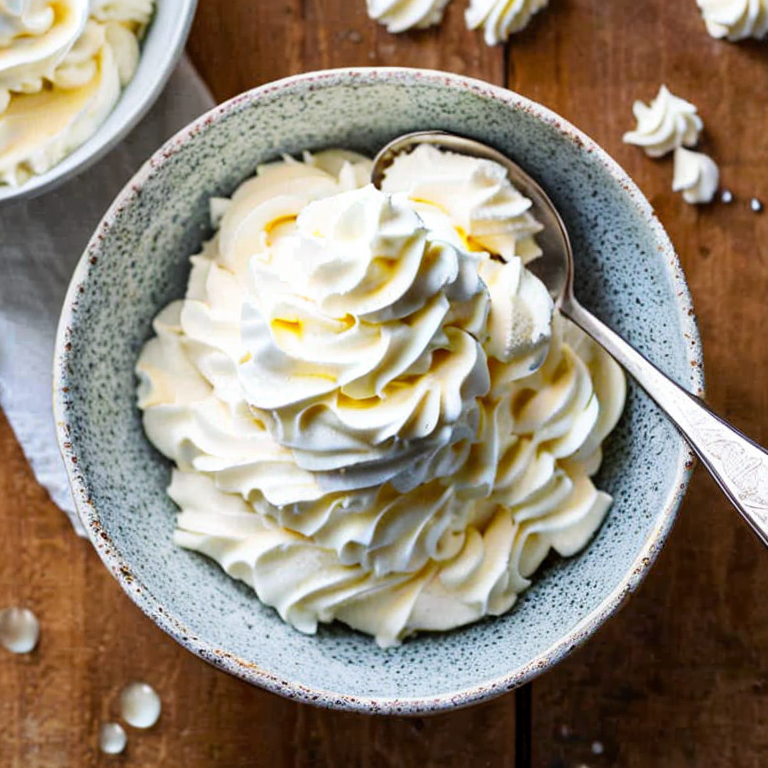
Whipped cream is a light and fluffy dessert topping that can elevate the taste of many desserts, such as pies, cakes, and hot beverages. It is typically made by whipping heavy cream until it thickens and forms soft peaks. Here’s a step-by-step guide to making whipped cream:
1. Gather Your Ingredients:
– Heavy cream (also known as whipping cream): Look for cream with a high fat content (around 35-40%). The higher the fat content, the easier it will be to whip the cream.
– Sugar (optional): Adding sugar enhances the flavor and sweetness of the whipped cream. You can adjust the amount based on your preference.
– Vanilla extract (optional): A small amount of vanilla extract can add a delightful flavor to the whipped cream.
2. Chill Your Equipment:
– To achieve the best results, it’s crucial to chill your mixing bowl and beaters or whisk before starting. Place them in the refrigerator for about 15-30 minutes. Cold equipment helps the cream thicken faster and creates a more stable whipped cream.
3. Prepare Your Workstation:
– Find a stable surface to work on, ensuring there is enough space for the mixing bowl and beaters or whisk.
– Make sure all your ingredients and equipment are within reach.
4. Measure the Cream:
– Start by measuring the desired amount of heavy cream. You can use a liquid measuring cup for this purpose.
5. Start Whipping:
– Pour the cold heavy cream into the chilled mixing bowl.
– If you’re using sugar, add it to the cream. Start with a small amount (1-2 tablespoons) and adjust to your taste preference.
– If you’re using vanilla extract, add a teaspoon or less, depending on your preference.
– Begin mixing the cream at a low speed, gradually increasing to medium-high speed as it thickens.
6. Watch for Soft Peaks:
– As you mix, keep an eye on the cream’s consistency. After a few minutes, you’ll notice soft peaks forming. Soft peaks are achieved when the cream holds its shape but still slightly droops at the peak when the beater or whisk is lifted.
7. Perfectly Whipped Cream:
– Once soft peaks have formed, be careful not to overmix. Overmixing can cause the cream to become grainy and eventually turn into butter.
– Stop mixing when you achieve the desired consistency. You can test it by lifting the beater or whisk; the cream should hold its shape without collapsing.
Congratulations! You’ve successfully made whipped cream from scratch. You can now use it as a delightful topping for your favorite desserts or enjoy it on its own. Remember to store any leftovers in an airtight container in the refrigerator for up to 2-3 days.
By following these steps, you’ll be able to make homemade whipped cream easily and impress your friends and family with your newfound expertise. Enjoy!
Whip It Good: Troubleshooting the Creamiest Conundrums!
Making whipped cream can be a simple process, but like any culinary endeavor, it can come with its own set of challenges. Here are some of the most common and uncommon issues that you may encounter when making whipped cream, along with solutions, tips, and advice to help you achieve perfect results:
1. Issue: Over-whipping the cream.
Solution: Be cautious while whipping and stop as soon as you reach the desired consistency. Over-whipped cream can turn into butter and separate into solid and liquid components.
2. Issue: Under-whipping the cream.
Solution: Whip the cream until it reaches stiff peaks. This means that when you lift the whisk, the cream should hold its shape without collapsing. If it’s too soft, continue whipping until you achieve the desired consistency.
3. Issue: Using cream with insufficient fat content.
Solution: Whipping cream with a higher fat content (around 35-40%) will yield better results. Avoid using low-fat or light creams, as they may not whip properly or produce the desired texture.
4. Issue: Cream not getting thick enough.
Solution: Ensure that both the cream and the mixing bowl are chilled before whipping. Using a metal bowl can help retain the cold temperature. If the cream still doesn’t thicken, it may be due to low fat content or using cream that is close to its expiration date.
5. Issue: Incorporating air bubbles unevenly.
Solution: To prevent uneven bubbles, start whisking slowly and gradually increase the speed. Move the whisk in a circular motion and avoid vigorous or erratic movements. This will help incorporate air evenly throughout the cream.
6. Issue: Difficulty in stabilizing whipped cream.
Solution: Adding a stabilizer, such as powdered sugar or gelatin, can help maintain the whipped cream’s shape and prevent it from deflating too quickly. For powdered sugar, add about 1-2 tablespoons per cup of cream. Follow the instructions on the gelatin package for the correct amount to use.
7. Issue: Whipped cream melting or losing volume quickly.
Solution: If you plan to use whipped cream as a topping, it’s best to add it just before serving. Keep the whipped cream refrigerated until needed. If you need to prepare it in advance, stabilize it with a stabilizer as mentioned above.
8. Issue: Whipped cream turning grainy or lumpy.
Solution: Make sure to use fresh cream, as older cream may not whip as well. If your cream starts to turn grainy or lumpy, it may be over-whipped. Stop immediately and remaking is necessary.
9. Issue: Whipped cream not holding its shape for decorating.
Solution: For decorative purposes, you can use stabilized whipped cream or opt for alternatives like heavy cream stabilized with cream cheese or mascarpone. These variations will hold their shape better and are ideal for piping or intricate designs.
Remember to store any leftover whipped cream in an airtight container in the refrigerator and consume it within a day or two for the best taste and texture.
By following these tips and solutions, you should be able to overcome most of the common issues that may arise when making whipped cream and achieve light, fluffy, and delicious results every time.
Whisking Wonders: Master the Art of Whipped Cream!
If you’re already an expert in making whipped cream, congratulations! It’s time to explore some other exciting projects that can take your culinary skills to the next level. Here are a few suggestions:
1. Infused Whipped Cream: Experiment with different flavors by infusing your whipped cream with various ingredients. For example, you can add a teaspoon of vanilla extract, a tablespoon of cocoa powder, or a splash of your favorite liqueur to the cream before whipping it. This will create a unique and delicious twist to your whipped cream.
2. Flavored Whipped Cream: Explore different flavor combinations by adding fruit purees or extracts to your whipped cream. For instance, you can fold in some strawberry puree, a bit of lemon zest, or a touch of almond extract to give your whipped cream a refreshing taste.
3. Whipped Cream Frosting: Use your expertise in whipped cream to create a light and fluffy frosting for cakes and cupcakes. Whip the cream until it forms stiff peaks and then gently fold in powdered sugar to sweeten it. This frosting is delicate and pairs well with fruity or light-flavored cakes.
4. Whipped Cream Mousse: Take your whipped cream to the next level by incorporating it into a mousse. Prepare a flavored mousse base (such as chocolate or fruit puree) and then fold in the whipped cream to create a light and airy texture. Chill in the refrigerator for a few hours to set, and you’ll have an elegant dessert ready to be enjoyed.
5. Whipped Cream Pavlova: Master the art of making a pavlova, a meringue-based dessert topped with whipped cream and fresh fruits. Whip up your cream with a touch of sugar and vanilla, then spread it generously over a baked pavlova base. Add your favorite fruits, such as berries, kiwi, or passion fruit, for a vibrant and indulgent treat.
Remember, as an expert, precision and technique are key. Pay attention to the consistency of your whipped cream and ensure that you don’t overwhip it, as it can lead to a grainy texture. Also, be mindful of the sweetness level, as adding too much sugar can overpower the flavors.
Enjoy exploring these advanced whipped cream projects and have fun experimenting with new flavors and techniques!
Tags: creamywhippedcream, deliciouswhippedcream, easywhippedcream, flavoredwhippedcream, fluffywhippedcream, homemadewhippedcream, howtomakewhippedcream, sweetwhippedcream, vanillawhippedcream, whippedcream, whippedcreamdessert, whippedcreamforcakes, whippedcreamforcoffee, whippedcreamforhotchocolate, whippedcreamforpies, whippedcreamfromscratch, whippedcreamingredients, whippedcreamrecipe, whippedcreamtopping, whippedcreamtutorial
Tweet