Master the Art of Ceiling Fan Euphoria: A Cleaning Guide
Cleaning ceiling fans is an essential part of maintaining a clean and healthy home environment. Ceiling fans tend to accumulate dust and dirt over time, which can not only affect their efficiency but also lead to allergens being circulated in the air. By regularly cleaning your ceiling fans, you can improve air quality and prolong the life of your fan. Let’s dive into the step-by-step process of cleaning ceiling fans:
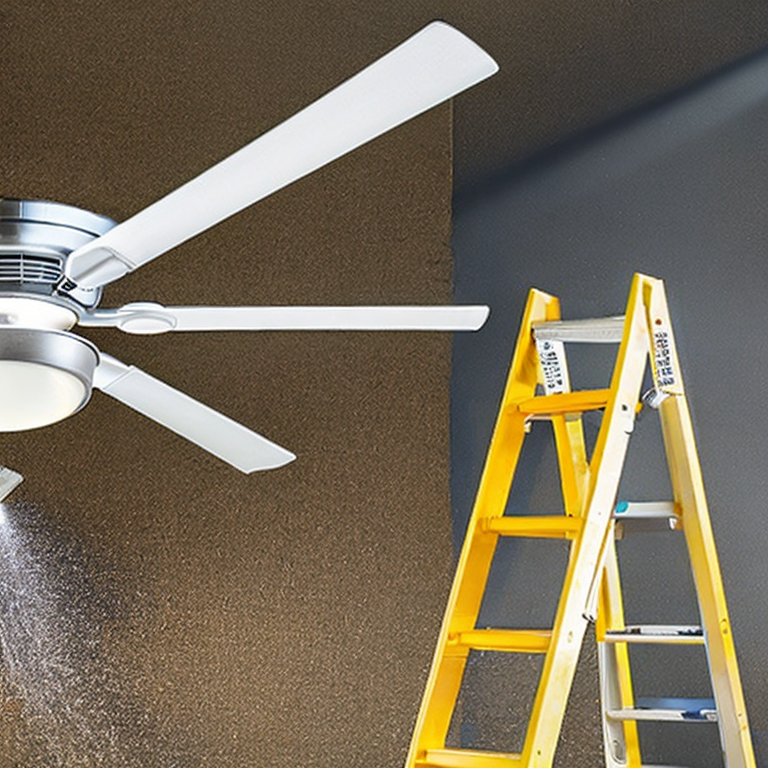
1. Preparing for the task:
– Safety first: Before starting, ensure that the fan is turned off and disconnected from the power source. This eliminates the risk of electric shock.
– Gather supplies: You’ll need a sturdy ladder or step stool, a microfiber cloth or dusting tool, a vacuum cleaner with a brush attachment, a pillowcase or plastic bag, a mild detergent or cleaning solution, and a bucket of water.
2. Dusting the fan blades:
– Climb the ladder or use a step stool to reach the fan blades safely.
– Start by using a microfiber cloth or a specially designed dusting tool to wipe away loose dust from the top surface of the blades. Microfiber cloths are preferred as they trap dust effectively without spreading it around.
– Work your way around each blade, cleaning both the upper and lower surfaces. It’s important to be thorough but gentle to avoid bending or damaging the blades.
– If the fan blades are particularly dusty, you can also use a vacuum cleaner with a brush attachment to remove the loose dirt. Simply hold the vacuum hose close to the blades while gently brushing off the dust.
3. Cleaning the fan blades:
– Fill a bucket with warm water and add a small amount of mild detergent or a gentle cleaning solution. Avoid using harsh chemicals as they may damage the fan’s finish.
– Dampen a microfiber cloth or sponge in the soapy water and wring out any excess liquid. You want the cloth to be damp, not dripping wet.
– Starting from the top, wipe each blade with the damp cloth, removing any remaining dirt or stains. Be careful not to let excess water drip onto the motor or other electrical components.
– If the blades have stubborn stains or grime, you can add a few drops of the cleaning solution directly onto the cloth and gently scrub the affected area.
– Once all the blades are clean, use a fresh damp cloth to wipe away any soap residue. This step is crucial to prevent dirt from sticking to the fan when it dries.
4. Cleaning the fan housing:
– After cleaning the blades, it’s important to give attention to the fan housing or canopy. This is the part that attaches the fan to the ceiling.
– Use a microfiber cloth or a sponge dampened with the soapy water to wipe down the housing, removing any dust or dirt. Pay attention to any crevices or decorative features that may require extra cleaning.
– If the housing is made of metal, you can use a metal cleaner or polish to restore its shine. Be sure to follow the manufacturer’s instructions for the specific cleaner being used.
5. Cleaning the fan accessories:
– If your ceiling fan has any additional accessories, such as light fixtures or decorative attachments, these should also be cleaned regularly.
– Remove any light bulbs or covers and clean them separately using a microfiber cloth or a suitable cleaning solution.
– For glass or plastic light covers, you can use a mixture of warm water and mild dish soap. Gently scrub the covers, rinse them under running water, and dry them thoroughly before reattaching.
– If your fan has pull chains or other small parts, wipe them down with a damp cloth to remove any dirt or fingerprints.
6. Final touches:
– After cleaning all the components, take a step back and inspect the fan for any missed spots or streaks. Use a clean, dry microfiber cloth to touch up any remaining dust or moisture.
– Dispose of the dust and dirt collected during the cleaning process. You can simply place the used microfiber cloth in a plastic bag or use a pillowcase to cover the blades, trapping the dust inside. Gently slide the pillowcase or bag off the blades, collecting the debris within it.
By following these step-by-step instructions, you can keep your ceiling fans clean and well-maintained. Remember to clean your ceiling fans at least once every few months or more frequently if you live in a particularly dusty environment. Regular cleaning not only helps to keep your fans looking their best but also ensures optimal performance and air quality within your home.
Dust Busters: Tackling Troublesome Ceiling Fan Clean-ups!
Cleaning ceiling fans can be a daunting task, but with the right approach and tools, it can be made easier and more efficient. Here are some common and uncommon issues that you may encounter when cleaning ceiling fans, along with solutions, tips, and advice to tackle them:
1. Dust accumulation: Ceiling fans tend to collect a significant amount of dust over time, which can be challenging to remove. To combat this issue, use a long-handled duster or a microfiber cloth to gently wipe the blades. You can also consider using a vacuum cleaner with a brush attachment to remove stubborn dust.
2. Hard-to-reach areas: Ceiling fans installed in high ceilings or with intricate designs may have hard-to-reach areas that are difficult to clean. In such cases, consider using an extendable duster or a ladder to safely access those areas. Alternatively, you can use a ceiling fan cleaning tool specifically designed to clean the blades and motor housing.
3. Dirty fan blades: If the blades of your ceiling fan are greasy or have stubborn stains, you can mix a solution of warm water and mild dish soap. Dampen a cloth with this solution and gently wipe the blades. Avoid using excessive water as it can damage the motor.
4. Excessive noise or wobbling: If your ceiling fan is making excessive noise or wobbling while running, it may indicate a maintenance issue. Make sure the fan is turned off and secure all the screws and connections. If the problem persists, it might be best to consult a professional electrician or contact the manufacturer for assistance.
5. Light fixture cleaning: Ceiling fans with integrated light fixtures may require additional attention. Before cleaning the light fixture, make sure to turn off the power and allow the bulbs to cool down. Use a soft cloth or a glass cleaner to clean the light covers and bulbs, ensuring they are free from dust and grime.
6. Regular maintenance: To minimize the frequency and intensity of cleaning, it is crucial to perform regular maintenance on your ceiling fan. This includes dusting the blades every few weeks, checking for loose screws or connections, and lubricating the motor if necessary. Regular maintenance can help extend the life of your ceiling fan and keep it running smoothly.
7. Safety precautions: When cleaning ceiling fans, it’s important to prioritize safety. Always turn off the fan and wait for the blades to stop completely before starting the cleaning process. Use sturdy ladders or step stools to access higher areas, ensuring stability and balance. If you have any concerns about your ability to clean the fan safely, consider hiring a professional cleaning service.
Remember, each ceiling fan may have specific cleaning instructions provided by the manufacturer. It’s always a good idea to refer to the user manual or their website for any specific recommendations or precautions. By following these tips and taking necessary precautions, you can effectively clean your ceiling fans and maintain their performance for years to come.
Dust Busters: Mastering the Art of Ceiling Fan Cleaning
For advanced users who are already experts in cleaning ceiling fans, there are several other projects that you can tackle to maintain a clean and organized home. Here are a few suggestions:
1. Deep Clean Carpets: While regular vacuuming helps keep carpets clean, an occasional deep clean can remove embedded dirt and stains. Rent or purchase a carpet cleaner and use it according to the manufacturer’s instructions. Start by vacuuming the carpet thoroughly, then apply the cleaning solution and work it into the fibers. Finally, use the carpet cleaner to extract the dirt and excess moisture. Allow the carpet to dry completely before walking on it.
2. Clean Window Blinds: Window blinds tend to accumulate dust and grime over time. To clean them, start by closing the blinds and using a duster or a microfiber cloth to remove loose dust. Then, depending on the material of your blinds, you can either wipe them down with a damp cloth or use a mild cleaning solution. For fabric blinds, check the manufacturer’s instructions for specific cleaning recommendations.
3. Refresh Upholstery: If your furniture upholstery is looking dull or stained, consider giving it a refresh. Start by vacuuming the upholstery to remove any loose dirt and debris. For fabric upholstery, you can use a fabric cleaner or a mixture of mild detergent and water to spot clean stains. Leather upholstery requires special care and can be cleaned using a leather cleaner and conditioner. Always test any cleaning solution on a small, inconspicuous area first.
4. Polish Wood Furniture: To keep your wood furniture looking its best, periodic polishing is essential. Start by dusting the furniture with a soft cloth or a microfiber duster. Then, choose a suitable wood polish or furniture oil and apply it in the direction of the wood grain using a clean cloth. Follow the product instructions for drying and buffing. Regular polishing not only enhances the appearance of the furniture but also helps protect the wood.
5. Organize and Declutter: If you’ve mastered the art of cleaning, take some time to declutter and organize your living spaces. Start with one area at a time, such as a closet, pantry, or garage. Sort through your belongings, donate or discard items you no longer need, and find proper storage solutions for the remaining items. Utilize shelves, baskets, and bins to keep things organized and easily accessible.
Remember, as an expert cleaner, you’re already familiar with the importance of using appropriate cleaning products, following safety guidelines, and paying attention to details. These advanced projects will help you maintain a clean and well-organized home, showcasing your expertise in household maintenance.
Tags: ceilingfanblades, ceilingfancare, ceilingfanmaintenance, ceilingfans, cleanair, cleaning, cleaninghacks, cleaningtips, deepcleaning, DIYcleaning, dustremoval, dust-free, dust-freehome, dusting, fanblades, fancleaning, homeimprovement, homemaintenance, householdcleaning, householdtips
Tweet