Elevate your gardening game with a DIY raised garden bed!
Building a raised garden bed is a great way to grow your own plants, whether you have limited space, poor soil conditions, or just want to have more control over your gardening environment. In this step-by-step guide, we will walk you through the process of building a raised garden bed from scratch, starting with the basics and gradually expanding your knowledge.
Step 1: Choosing the Location
The first step in building a raised garden bed is to select a suitable location. Look for an area in your yard that receives at least 6-8 hours of direct sunlight per day. Make sure the location is easily accessible for watering and maintenance. Consider the size of the bed you want to build and ensure it fits well within the chosen space.
Step 2: Gathering Materials
To build a raised garden bed, you will need the following materials:
– Wood boards or composite lumber: Choose untreated, rot-resistant wood like cedar or redwood, or opt for composite lumber that doesn’t require maintenance.
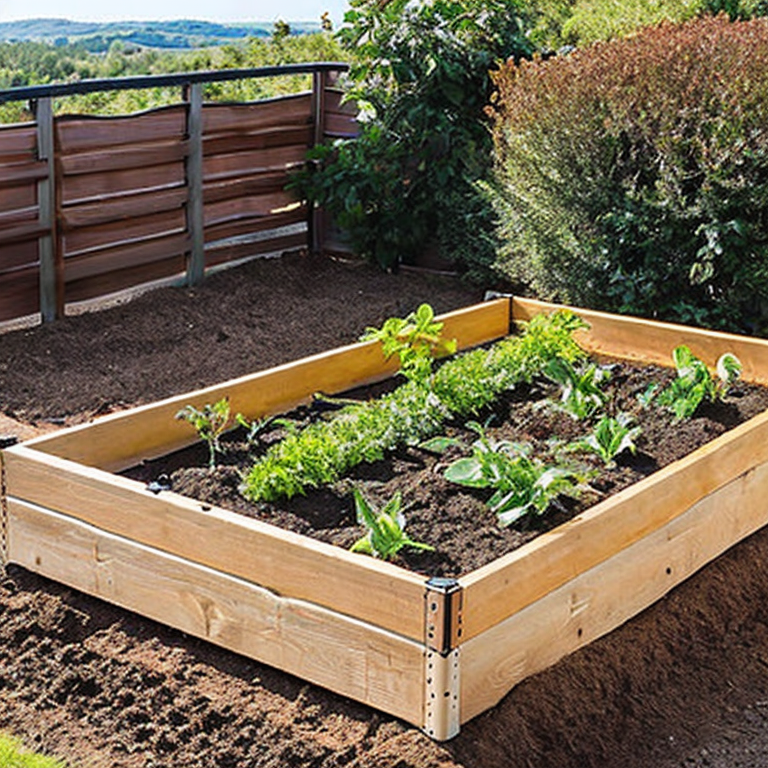
– Corner brackets or stakes: These will help hold the boards together and provide stability.
– Level: To ensure your bed is even and properly aligned.
– Weed barrier or cardboard: This will prevent weeds from growing up through the bed.
– Soil mixture: A blend of quality garden soil, compost, and organic matter will provide nutrients for your plants.
Step 3: Building the Bed
Now that you have your materials ready, it’s time to start building the bed:
1. Measure and mark the dimensions of your desired bed on the ground using stakes and string.
2. Dig a shallow trench along the perimeter of the marked area to create a level base for the bed.
3. Place the wood boards or composite lumber on the trench, forming a rectangular or square shape.
4. Attach the boards together at the corners using corner brackets or stakes, ensuring they are securely fastened.
5. Use a level to make sure the bed is even and adjust as needed.
6. If you’re concerned about weeds, lay a weed barrier or cardboard at the bottom of the bed, covering the entire interior.
Step 4: Filling the Bed
Once the bed is built, it’s time to fill it with soil:
1. Start by adding a layer of compost or organic matter to the bottom of the bed. This will improve soil fertility and drainage.
2. Fill the rest of the bed with a mixture of quality garden soil and compost. Aim for a ratio of 60% soil to 40% compost.
3. Use a rake or shovel to mix the soil and compost thoroughly, ensuring they are well combined.
Step 5: Maintaining the Bed
Now that your raised garden bed is complete, it’s important to maintain it properly:
1. Water your plants regularly, ensuring the soil remains moist but not waterlogged.
2. Mulch the surface of the bed with organic materials like straw or wood chips to conserve moisture, suppress weeds, and regulate soil temperature.
3. Monitor your plants for pests and diseases, and take appropriate action if necessary.
4. Rotate crops annually to prevent nutrient depletion and minimize the risk of pests and diseases.
5. Regularly add compost or organic matter to replenish nutrients in the soil.
By following these steps, you can build and maintain a successful raised garden bed. Remember to choose plants that are suitable for your climate and gardening goals. With time and experience, you’ll become an expert in growing your own vegetables, herbs, or flowers!
Raising the Bar: Navigating the Trials of Garden Bed Construction
When building a raised garden bed, there are several common and uncommon issues that may arise. Here are some of the most common issues and their solutions, along with tips and advice for a successful raised garden bed project:
1. Soil Drainage: Poor drainage is a common issue that can lead to root rot and other plant diseases. To improve drainage, consider adding a layer of gravel or broken pottery at the bottom of the bed before adding soil. Additionally, using a well-draining soil mix with a good balance of organic matter can help promote healthy root growth.
2. Weed Control: Weeds can quickly overtake a raised garden bed if not properly managed. To prevent weed growth, lay down a weed barrier fabric at the bottom of the bed before adding soil. Regularly inspect the bed for any emerging weeds and promptly remove them by hand. Mulching the surface can also help suppress weed growth.
3. Pest Protection: Raised garden beds can be vulnerable to pests such as slugs, snails, and rodents. Install a barrier, such as a wire mesh, around the bed to prevent pests from accessing the plants. Additionally, companion planting can help repel certain pests naturally. For example, marigolds can deter aphids and nematodes.
4. Watering and Irrigation: Proper watering is crucial for the health of your plants. Ensure your raised bed has adequate drainage and consider installing drip irrigation systems or soaker hoses to provide consistent moisture to the plants. Regularly check the moisture level of the soil and adjust watering accordingly, avoiding over-watering or allowing the soil to dry out completely.
5. Nutrient Balance: Over time, the soil in raised garden beds can become depleted of nutrients. Add organic matter, such as compost or well-rotted manure, regularly to replenish nutrients in the soil. Consider conducting soil tests periodically to determine if any specific nutrients are lacking and amend the soil accordingly.
6. Sunlight Exposure: Ensure that your raised garden bed is positioned in a location that receives adequate sunlight for the plants you intend to grow. Most vegetables require at least 6-8 hours of direct sunlight per day. If your garden bed is in a shady area, consider growing shade-tolerant plants or installing shade cloth to provide some protection from intense sunlight.
7. Bed Stability: Raised garden beds can sometimes shift or become unstable over time. To prevent this, use sturdy materials for construction, such as rot-resistant wood or durable composite materials. If using wooden boards, consider reinforcing the corners with metal brackets or adding additional support in the center. Regularly inspect the bed for any signs of damage or instability and repair as needed.
8. Size and Accessibility: When planning your raised garden bed, consider the size and accessibility for ease of maintenance and harvesting. Ensure that the width of the bed allows you to comfortably reach the center from both sides without stepping into the bed. This will prevent soil compaction and damage to plant roots. If mobility is a concern, consider building taller beds or incorporating raised garden bed designs that accommodate individuals with physical limitations.
By addressing these common and uncommon issues and following the provided solutions, tips, and advice, you can create a successful raised garden bed that promotes healthy plant growth and a bountiful harvest. Happy gardening!
Elevate Your Gardening Game: Master the Art of Raised Beds
If you’re already an expert in building raised garden beds, congratulations on mastering this essential gardening project! Now it’s time to take your gardening skills to the next level and explore some advanced projects. Here are a few ideas to inspire you:
1. Tiered Garden Beds: Create a visually appealing garden by building tiered beds. Start with a large base bed and gradually decrease the size of the beds as you move upwards. This design not only adds dimension to your garden but also provides better drainage and facilitates easy access for planting, maintenance, and harvesting.
2. Greenhouse or Cold Frame: Extend your growing season and protect your plants from harsh weather conditions by constructing a greenhouse or a cold frame. A greenhouse provides a controlled environment for year-round gardening, while a cold frame is a more compact structure that helps to protect plants during colder months.
3. Vertical Gardening: Utilize vertical space by constructing vertical garden structures like trellises, arbors, or living walls. These structures not only add a decorative touch to your garden but also allow you to grow vining plants, flowers, and even vegetables, optimizing space and increasing yield.
4. Irrigation Systems: Upgrade your watering methods by installing an automated irrigation system. This system can include drip irrigation, soaker hoses, or sprinklers controlled by timers or moisture sensors. An automated watering system ensures that your plants receive the right amount of water at the right times, saving you time and conserving water.
5. Composting Stations: Enhance your garden’s sustainability by building a composting station. This can be a three-bin system that allows you to compost various materials at different stages. Compost is a nutrient-rich soil amendment that will enrich your garden beds and reduce waste.
6. Rainwater Harvesting: Consider setting up a rainwater harvesting system to collect and store rainwater for your garden. This eco-friendly practice reduces water bills and ensures a sustainable water source for your plants during dry spells. Install rain barrels or a more extensive underground storage system depending on your needs.
7. Garden Shed or Tool Storage: Build a dedicated garden shed or tool storage area to keep your gardening tools organized and protected. This structure will not only provide a designated workspace but also prevent clutter in your garden area.
Remember, these advanced projects require careful planning and skillful execution. Ensure that you research and understand the specific requirements for each project before proceeding. Happy gardening and exploring new horizons in your gardening journey!
Tags: DIY, gardenbedconstruction, gardenbedcrops, gardenbeddimensions, gardenbedmaintenance, gardenbedmaterials, gardenbedpests, gardenbedsoil, gardenbedwatering, gardendesign, gardening, gardeningforbeginners, gardeningideas, gardeningtips, organicgardening, outdoorproject, raisedbedgardening, raisedgardenbed, sustainablegardening, vegetablegarden
Tweet