Unveiling the Secrets to Sparkling Cabinet Surfaces!
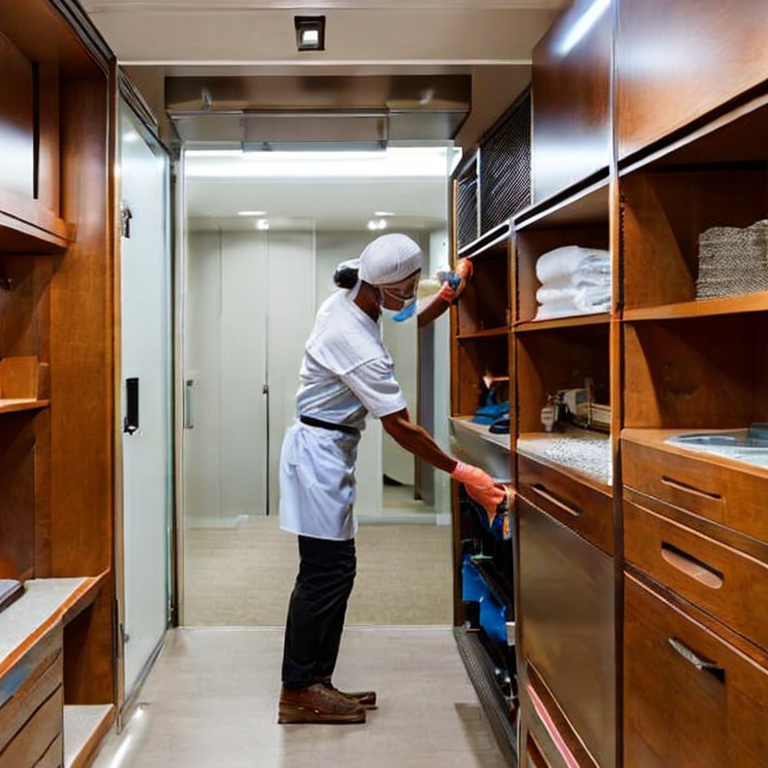
Wiping down cabinets is an essential part of maintaining a clean and organized kitchen or any other space with cabinets. Regularly cleaning cabinets not only keeps them looking nice but also helps remove dirt, grease, and other grime that can accumulate over time. In this guide, I will walk you through the step-by-step process of how to effectively wipe down cabinets, from gathering the necessary supplies to the actual cleaning techniques.
Here’s what you’ll need:
1. Cleaning solution: Choose a mild detergent or a multipurpose cleaner. Avoid using harsh chemicals, as they can damage the cabinet’s finish.
2. Microfiber or soft, lint-free cloth: These are ideal for cleaning cabinets as they won’t scratch the surfaces.
3. Warm water: You’ll need this for diluting the cleaning solution and rinsing the cloth.
4. Bucket or spray bottle: Use a bucket to mix the cleaning solution with water, or fill a spray bottle with the diluted solution for easy application.
Now that we have our supplies ready, let’s move on to the step-by-step process of wiping down cabinets:
Step 1: Clear the area and remove any loose debris
Start by removing any items from the cabinets that might obstruct the cleaning process. Clear out the cabinets, including dishes, food containers, or other items. This will give you easy access to the surfaces you need to clean. Additionally, use a dry cloth or a duster to remove any loose debris, such as crumbs or dust, from the cabinet surfaces.
Step 2: Prepare the cleaning solution
Next, mix the cleaning solution with warm water in a bucket or use a spray bottle if you prefer. Follow the instructions on the cleaning product for the correct dilution ratio, as it may vary depending on the brand. Be sure to wear gloves if the cleaning solution contains any strong chemicals.
Step 3: Test on an inconspicuous area
Before starting to clean the entire cabinet, it’s a good idea to test the cleaning solution on a small, inconspicuous area. This will help ensure that the cleaner doesn’t cause any discoloration or damage to the cabinet’s finish. Wait a few minutes and check for any adverse reactions before proceeding.
Step 4: Wipe down the cabinet exteriors
Begin by dipping a microfiber cloth into the cleaning solution, making sure to wring out any excess liquid. Wipe down the exterior surfaces of the cabinets, starting from the top and working your way down. Use gentle, circular motions to remove grease, fingerprints, and other dirt. Pay particular attention to areas near handles or knobs, as they tend to accumulate more grime.
Step 5: Clean the cabinet interiors
After cleaning the exteriors, move on to cleaning the interior shelves and surfaces. Remove any items from the cabinets and wipe down the shelves, walls, and base using the same cleaning solution and cloth. If there are any stubborn stains or spills, you can use a soft-bristle brush or an old toothbrush to gently scrub them away. Rinse the cloth frequently to avoid spreading dirt around.
Step 6: Rinse and dry
Once you have finished wiping down all the cabinets, rinse the cloth with warm water and wring out any excess liquid. Go over the cabinets again, this time using the damp cloth to remove any cleaning residue or soap residue. Finally, use a clean, dry microfiber cloth to thoroughly dry the cabinet surfaces, preventing water spots or streaks.
Step 7: Polish (optional)
If you want to give your cabinets an extra shine, you can use a cabinet polish or a homemade solution of equal parts vinegar and water. Apply a small amount of the polish or homemade solution to a clean cloth and gently buff the cabinet surfaces. This step is optional but can enhance the appearance of your cabinets.
By following these step-by-step instructions, you can effectively wipe down your cabinets and keep them looking clean and well-maintained. Regularly incorporating this cleaning routine into your household chores will help prolong the life of your cabinets and maintain a fresh and inviting space.
Cabinet Woes: Unveiling the Hidden Challenges of Wiping Away Grime
When it comes to wiping down cabinets, there are a few common and uncommon issues that you may encounter. Here are some of them along with their solutions, tips, and advice:
1. Greasy residue: One common issue is finding greasy residue on the cabinet surfaces, especially in the kitchen. To tackle this problem, mix equal parts of vinegar and water and use a soft cloth or sponge to wipe down the cabinets. Vinegar helps to cut through grease and leaves a clean surface. Avoid using abrasive cleaners as they may damage the cabinet finish.
2. Stubborn stains: Sometimes, cabinets may have stubborn stains that are difficult to remove. In such cases, a mild dish soap solution can be effective. Mix a few drops of dish soap with warm water and use a microfiber cloth or sponge to gently scrub the stained areas. Rinse with clean water and dry thoroughly.
3. Water damage: Water damage can occur if the cabinets are not properly sealed or if there are leaks in the surrounding area. If you notice water spots or swelling on the cabinet surfaces, address the underlying issue first. Repair any leaks and ensure proper ventilation to prevent future damage. For minor water stains, you can try using a mixture of baking soda and water to gently scrub the affected areas.
4. Paint or finish peeling: In some cases, the paint or finish on cabinets may start peeling over time. This can happen due to moisture, heat, or poor quality materials. To fix this issue, you’ll need to remove the old paint or finish using a paint stripper or sandpaper. Once the surface is smooth, apply a new coat of paint or finish that is suitable for cabinets. Make sure to follow the manufacturer’s instructions for the best results.
5. Dust and dirt buildup: Cabinets tend to accumulate dust and dirt over time, especially in areas that are not frequently accessed. Regular cleaning and maintenance can help prevent excessive buildup. Use a soft cloth or duster to remove the dust from the cabinet surfaces. For hard-to-reach areas, you can use a vacuum cleaner with a brush attachment. Wipe down the cabinets with a damp cloth periodically to keep them clean and dust-free.
6. Uncommon issues: Occasionally, you may encounter uncommon issues such as mold or mildew growth inside the cabinets. If this happens, it’s important to address it promptly. Remove the affected items and clean the area with a mixture of water and bleach. Ensure proper ventilation to prevent moisture buildup in the future.
Remember, prevention is key when it comes to maintaining clean cabinets. Avoid using harsh chemicals or abrasive materials as they can damage the surfaces. Regularly check for any signs of damage or issues and address them as soon as possible. By following these tips and advice, you can keep your cabinets looking clean and well-maintained for years to come.
Cabinet Cleaning: Master the Art of a Spotless Shine
If you’re already an expert in wiping down cabinets, congratulations! Now it’s time to take your skills to the next level and tackle some more advanced projects in your home. Here are a few ideas for you:
1. Cabinet Refinishing: Instead of just wiping down the cabinets, consider refinishing them to give them a fresh new look. Start by removing the cabinet doors and hardware. Use sandpaper to remove the existing finish and create a smooth surface. Then, apply a primer followed by a couple of coats of paint or stain. Finally, reattach the doors and hardware for a brand new cabinet appearance.
2. Cabinet Organization: Take your cabinet cleaning skills a step further by organizing the contents inside. Consider installing additional shelves or dividers to maximize storage space. You can also label the shelves or use clear bins to keep everything organized and easily accessible. This will not only make your cabinets look neat and tidy but also make it more efficient to find what you need.
3. Cabinet Lighting: Upgrade your cabinets with some stylish and functional lighting. Install LED strip lights or puck lights underneath the cabinets to provide better visibility while working in the kitchen. This will not only enhance the ambiance but also make it easier to find items stored inside the cabinets.
4. Cabinet Hardware Replacement: Give your cabinets a fresh and modern look by replacing the hardware. Swap out the old handles or knobs with new ones that complement your kitchen style. This simple change can make a significant impact on the overall appearance of your cabinets.
5. Custom Cabinet Inserts: If you’re feeling particularly crafty, consider creating custom inserts for your cabinets. These can be made of wood, acrylic, or even metal mesh. Custom inserts allow you to organize your cabinets in a way that suits your specific needs. You can create dividers for pots and pans, spice racks, or even wine glass holders.
Remember, always prioritize safety and follow proper guidelines when attempting any advanced projects. It’s important to have the necessary tools and materials, and to take your time to ensure a quality outcome. Enjoy exploring these advanced cabinet projects and taking your expertise to new heights!
Tags: cabinetcare, cabinetcleaning, cabinetmaintenance, cabinetsurfaces, cleaninghacks, cleaningproducts, cleaningsupplies, cleaningtechniques, cleaningtips, decluttering, deepcleaning, eco-friendlycleaning, homecleaning, householdcleaning, kitchencleaning, kitchenhygiene, kitchenmaintenance, kitchenorganization, organizingcabinets, wipedowncabinets
Tweet