Master the Art of Floor Freshness: Vacuum and Mop Like a Pro!
Sure! I’ll guide you through the process of vacuuming and mopping floors step by step, starting from the basics and gradually expanding to cover all the necessary details.
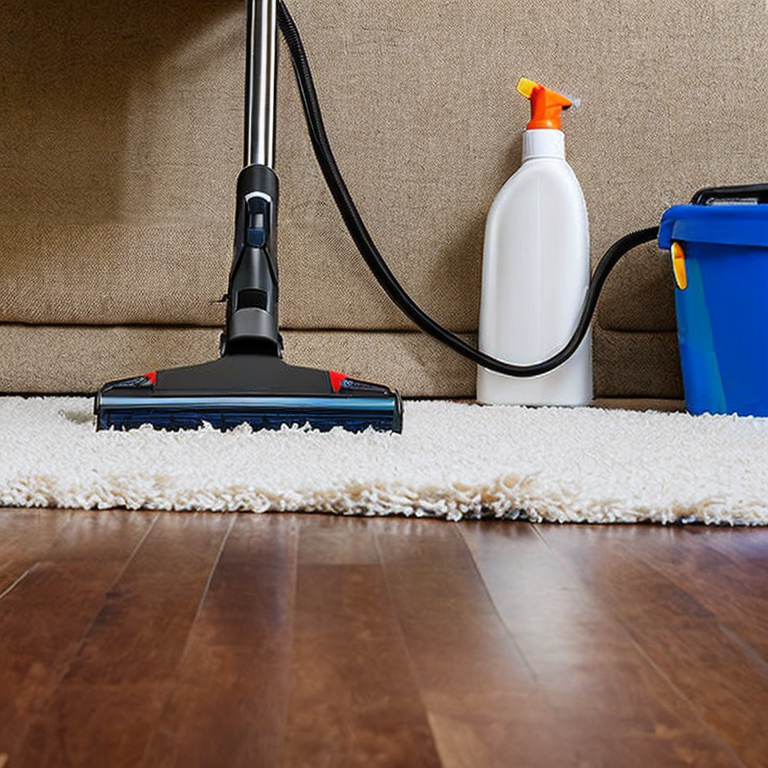
1. Gather the necessary tools and supplies:
– Vacuum cleaner: Choose a vacuum cleaner suitable for your flooring type (e.g., carpet, hardwood, tile).
– Mop: Select a mop appropriate for your flooring material (e.g., microfiber mop for hardwood, sponge mop for tile).
– Cleaning solution: Depending on the floor type, you may need a specific cleaning solution (e.g., hardwood cleaner, tile cleaner).
– Bucket: Use a bucket to hold water and cleaning solution for mopping.
– Broom and dustpan: These are handy for sweeping up larger debris before vacuuming.
2. Prepare the area:
– Clear the floor: Remove any furniture, toys, or other items from the area you will be vacuuming and mopping.
– Sweep the floor: Use a broom and dustpan to sweep up larger debris like dirt, crumbs, or pet hair. This step prevents the vacuum cleaner from getting clogged or pushing debris around.
3. Vacuuming:
– Adjust the vacuum cleaner settings: Set the vacuum cleaner to the appropriate height setting for your flooring type (e.g., high for thick carpets, low for hardwood).
– Plug in the vacuum cleaner: Make sure it’s properly connected and the power cord is long enough to reach all areas you plan to vacuum.
– Begin vacuuming: Start from the farthest corner of the room and work your way toward the exit. Use a slow and steady back-and-forth motion, overlapping each pass slightly to ensure thorough coverage.
– Pay attention to edges and corners: Utilize the vacuum cleaner attachments (such as a crevice tool or brush attachment) to clean hard-to-reach areas along baseboards, in corners, and around furniture legs.
– Vacuum under furniture: Move lightweight furniture, if possible, to vacuum underneath. For heavier furniture, use the vacuum cleaner attachments to reach under and around them.
4. Mopping:
– Prepare the cleaning solution: Follow the instructions on the cleaning solution bottle to mix the appropriate amount with water in the mop bucket. Use hot or warm water, depending on the cleaning solution’s recommendation.
– Dip the mop: Immerse the mop head into the cleaning solution, making sure it’s thoroughly soaked but not dripping excessively.
– Start mopping: Begin mopping from the farthest corner of the room, working your way toward the exit. Use a figure-eight or S-shaped motion to cover the floor evenly.
– Be mindful of the floor type:
– Hardwood floors: Wring out the mop well to avoid excess water on the wood surface. If the mop becomes too damp, switch to a dry mop or microfiber cloth for buffing.
– Tile or linoleum floors: Apply more pressure and scrub any stubborn stains or dirt spots. Pay attention to grout lines, ensuring they are thoroughly cleaned.
– Rinse the mop: Rinse the mop head in clean water regularly to avoid spreading dirt or residue while mopping.
– Change the water if needed: If the water becomes visibly dirty or cloudy, empty the bucket, prepare a fresh batch of cleaning solution, and continue mopping.
– Allow the floor to dry: After mopping, give the floor enough time to air dry. Avoid walking on the wet floor until it’s completely dry to prevent slips or smudging.
By following these steps, you’ll be able to vacuum and mop your floors effectively, ensuring they are clean and looking their best. Remember to consider the specific recommendations for your flooring type to maintain their longevity and appearance. Happy cleaning!
From Dust to Shine: Unveiling the Trials of Floor Care
When vacuuming and mopping floors, there are several common and uncommon issues that may arise. Here are some of them, along with solutions, tips, and advice to help you tackle them effectively:
1. Common Issue: Streaky or Smudged Floors
Solution: Ensure that you are using the right cleaning solution for your floor type. Follow the manufacturer’s instructions for the proper dilution and application. Additionally, make sure to use a clean mop or cloth and avoid using excessive water, as it can leave streaks. Thoroughly rinse the mop or cloth between passes to prevent smudging.
2. Common Issue: Lingering Odors
Solution: If you notice unpleasant odors after mopping, consider using a floor cleaner with deodorizing properties. Alternatively, you can add a few drops of essential oils (such as lemon or lavender) to your cleaning solution for a fresh scent. Adequate ventilation and regular cleaning of mop heads or cloths can also help eliminate odors.
3. Common Issue: Pet Hair or Excessive Debris
Solution: Before vacuuming, ensure that the vacuum cleaner is equipped with a suitable attachment for removing pet hair or larger debris. Regularly check and clean the vacuum’s brush roll and filters, as pet hair can easily accumulate and affect performance. For mopping, consider using a microfiber mop to effectively trap pet hair and debris.
4. Uncommon Issue: Stains or Discoloration
Solution: Different types of stains may require specific treatments. For example, a mixture of vinegar and water can help remove mineral deposits or water stains on certain floors. For stubborn stains, consult the manufacturer’s guidelines or seek professional advice to avoid damaging the floor. It’s always best to address stains promptly to prevent them from setting in.
5. Uncommon Issue: Damaged or Scratched Floors
Solution: Preventing floor damage is crucial. Place doormats at entrances to minimize dirt and sand accumulation, which can cause scratches. Avoid using abrasive cleaners or tools that can scratch or damage the floor’s surface. For hardwood floors, consider using protective pads on furniture legs and regularly trim pets’ nails to prevent scratches.
6. Tips and Advice:
– Regular maintenance is key to avoid build-up or damage to your floors. Establish a cleaning routine that suits your lifestyle and floor type.
– Vacuum or sweep floors before mopping to remove loose dirt and debris.
– Use a gentle, non-abrasive cleaner suitable for your specific floor type to avoid damaging the surface.
– Test any new cleaning products in a small, inconspicuous area before applying them to the entire floor.
– Avoid excessive water when mopping, as it can seep into cracks or joints and cause damage over time.
Remember, proper care and maintenance of your floors will not only preserve their appearance but also extend their lifespan.
Master the Art of Floor Care: Unlocking the Perfect Clean
For individuals who are already experts in vacuuming and mopping floors, there are several other projects that can enhance the cleanliness and appearance of their spaces. Here are a few suggestions:
1. Deep Cleaning Carpets: While regular vacuuming is essential, deep cleaning carpets can help remove embedded dirt and stains. Consider renting a carpet cleaner or hiring a professional service for a thorough carpet clean. Start by removing furniture and pre-treating any stubborn stains before using the carpet cleaner. Allow the carpets to dry completely before placing the furniture back.
2. Tile and Grout Cleaning: Grout lines can accumulate dirt and grime over time, making floors look dull. An advanced cleaning technique involves using a grout cleaner and a stiff brush to scrub the grout lines. Alternatively, steam cleaning can effectively remove stains and bacteria from both tiles and grout. Remember to seal the grout once it is clean to prevent future stains.
3. Hardwood Floor Refinishing: If you have hardwood floors, refinishing them can bring back their original luster and beauty. This advanced project involves sanding the floor to remove the existing finish and any imperfections. After sanding, apply a new coat of stain and finish to protect the wood and enhance its appearance. It’s important to follow the manufacturer’s instructions and use proper safety equipment for this project.
4. Upholstery Cleaning: Over time, upholstery can accumulate dirt, stains, and odors. Using a specialized upholstery cleaner, carefully follow the instructions to clean the fabric or hire a professional upholstery cleaning service. Always test the cleaning solution on a small, inconspicuous area before applying it to the entire piece.
5. Air Duct Cleaning: Cleaning the air ducts in your home can improve indoor air quality by removing dust, allergens, and debris. This advanced project usually requires professional assistance. They will use specialized equipment to clean the ducts thoroughly, ensuring that the air circulating in your home is clean and fresh.
When undertaking any advanced cleaning projects, it’s vital to prioritize safety. Wear appropriate protective gear, read and follow all instructions, and consider seeking professional help if needed. Remember, maintaining a clean and healthy living space is an ongoing process, and these advanced projects can help take your cleaning routine to the next level.
Tags: cleanfloors, cleaning, cleaningtips, efficientfloorcleaning, floorcare, floorcaretips, floorcleaning, floorcleaninghacks, floorcleaningroutine, floorcleaningtechniques, floorhygiene, floormaintenance, floors, homemaintenance, householdchores, housekeeping, mop, mopping, vacuum, vacuuming
Tweet