Revamp Your Shower Game: Master the Art of Tiling
Tiling a shower stall is a great way to upgrade the look of your bathroom. It can seem like a daunting task, but with the right tools and techniques, it can be a manageable project for those with some DIY experience. Here’s how to tile a shower stall:
1. Plan and prepare your project: Before you start tiling, it’s important to plan out your project and gather all the necessary tools and materials. Make sure you have enough tiles, grout, and adhesive for the job. You’ll also need tools like a tile cutter, trowel, and level. Measure the area you want to tile and make sure you have an accurate estimate of the number of tiles you’ll need.
2. Prepare the shower stall: If you’re tiling a new shower stall, make sure it has been properly constructed and waterproofed. If you’re tiling an existing shower, remove any old tiles and repair any damaged surfaces. Be sure to clean the surface thoroughly and remove any debris before you start tiling.
3. Lay out the tiles: Start by laying out the tiles on the floor or a flat surface to determine the best layout. Determine where you want to start tiling, usually at the bottom of the shower floor, and work your way up. You may need to cut tiles to fit around fixtures like the showerhead or faucet.
4. Apply the adhesive: Mix the adhesive according to the manufacturer’s instructions and apply it to the shower stall surface using a trowel. Work in small sections to ensure the adhesive doesn’t dry out before you can apply the tiles.
5. Install the tiles: Place the tiles on the adhesive, pressing them firmly into place. Use tile spacers to ensure even spacing between tiles. Cut tiles as needed to fit around fixtures or edges. Continue working in small sections until the shower stall is fully tiled.
6. Let the adhesive dry: Allow the adhesive to dry completely before grouting. This can take anywhere from a few hours to overnight, depending on the manufacturer’s instructions.
7. Grout the tiles: Mix the grout according to the manufacturer’s instructions and apply it to the tiles using a grout float. Work the grout into the spaces between the tiles, making sure to fill all the gaps. Wipe away any excess grout with a damp sponge. Let the grout dry for a few hours.
8. Seal the grout: Once the grout is dry, apply a grout sealer to protect the grout from moisture and stains. Follow the manufacturer’s instructions for best results.
And that’s it! With some patience and attention to detail, you can tile a shower stall and transform your bathroom into a beautiful and functional space.
Shower tiling got you soaked? Here’s how to stay dry
Tiling a shower stall can be a challenging task, and there are several common and uncommon issues that you may encounter during the process. Here are some of the most common issues and their solutions, tips, and advice:
1. Uneven Substrate: If the substrate is uneven, it can cause the tiles to be uneven as well. This can lead to lippage, which is when the edges of the tiles are not level and create an uneven surface. To avoid this issue, you should make sure the substrate is level before you start tiling. If it is not level, you can use a self-leveling compound to even it out.
2. Water Damage: Shower stalls are exposed to a lot of moisture, and if the tiles are not installed correctly, water can seep through the cracks and cause damage to the substrate and walls. To prevent this, you should use a waterproofing membrane before you start tiling. This will create a barrier between the tiles and the substrate, preventing water from seeping through.
3. Grout Haze: Grout haze is a common issue that occurs when the grout is not wiped off the tiles properly. This can leave a film on the tiles that is difficult to remove. To prevent grout haze, make sure to wipe the tiles with a damp sponge immediately after applying the grout. You can also use a grout haze remover to get rid of any haze that remains.
4. Tile Chips and Breaks: Tiles can chip or break during installation, especially if they are not handled carefully. To avoid this, make sure to handle the tiles gently and use tile spacers to ensure they are properly aligned. If a tile does chip or break, you can replace it with a new one.
5. Uncommon Issue: Mold and Mildew: Mold and mildew can grow in the grout lines and on the tiles if they are not cleaned regularly. To prevent this, use a mildew-resistant grout and clean the tiles regularly with a mixture of water and vinegar. You can also use a mold and mildew cleaner to get rid of any existing mold or mildew.
Overall, tiling a shower stall requires careful planning and attention to detail. By following these tips and addressing any issues that arise, you can ensure a successful and beautiful tiled shower stall.
Transform Your Shower Space with These Tiling Tips
For advanced users who are already experts in tiling a shower stall, there are a wide range of projects that can be tackled. Here are a few ideas:
1. Create a tiled backsplash: Tiling a backsplash in a kitchen or bathroom can add a beautiful and functional touch to the space. Make sure to choose a tile that complements the color scheme and style of the room.
2. Install a tiled accent wall: Adding a tiled accent wall in a living room, bedroom, or entryway is a great way to make a statement. Consider using a patterned or textured tile for added interest.
3. Tile a fireplace surround: A tiled fireplace surround can add a cozy and stylish touch to a living room or bedroom. Choose a tile that complements the color and style of the room, and consider adding a contrasting grout color for added visual interest.
4. Create a tiled outdoor space: Tiling an outdoor patio, pool deck, or walkway can add a durable and beautiful touch to your outdoor living space. Make sure to choose a tile that is rated for outdoor use and can withstand the elements.
5. Create a tiled shower bench or niche: If you’re already an expert in tiling a shower stall, consider adding a built-in bench or niche to the shower for added functionality and style. Make sure to choose a tile that complements the rest of the shower design.
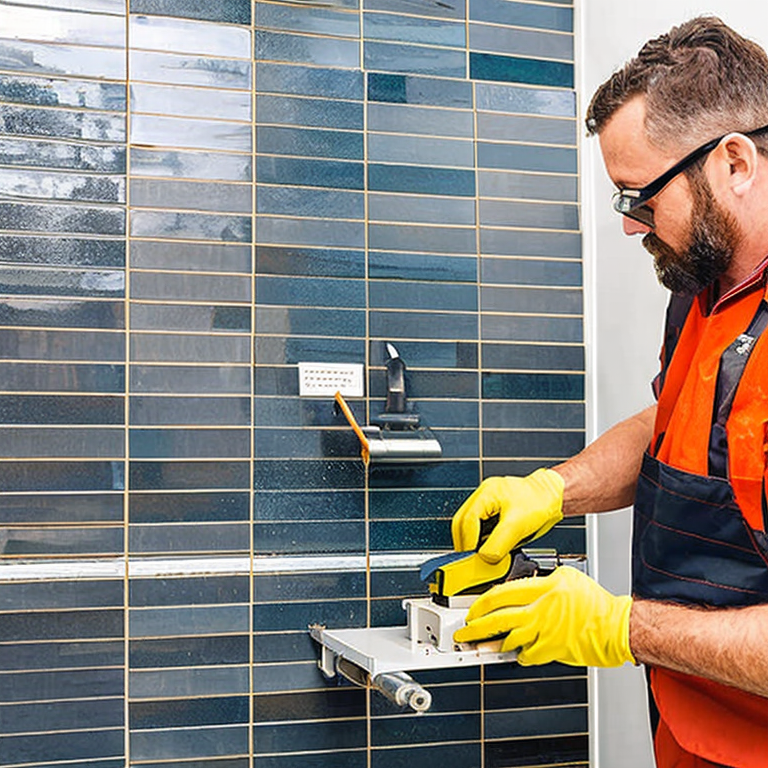
As an advanced user, it’s important to remember to take your time and measure twice before making any cuts. Additionally, always wear protective gear, such as gloves and safety glasses, when working with tile and tools. And finally, don’t be afraid to experiment with different tile patterns and designs to create a unique and personalized look.
Tags: 1.Showertile, 10.Naturalstonetile, 11.Waterproofing, 12.Showerpan, 13.Showerdrain, 14.Showerniche, 15.Tilesaw, 16.Tilespacers, 17.Thinsetmortar, 18.Backerboard, 19.Sealingtile, 2.Tilingashower, 20.Maintenance., 3.DIYshowertiling, 4.Tileinstallation, 5.Bathroomrenovation, 6.Showerstall, 7.Grout, 8.Ceramictile, 9.Porcelaintile
Tweet
Great article! I must admit that I have always been a bit apprehensive about tackling a project like tiling a shower stall. However, your detailed step-by-step instructions have given me the confidence to give it a try. The way you explain each stage of the process and provide tips and tricks along the way is incredibly helpful.
I appreciate how you emphasize the importance of proper preparation before diving into the tiling process. It’s clear that attention to detail is crucial to achieving a professional-looking result. The section on choosing the right tiles and grout color was particularly enlightening. I never realized how much of an impact those choices can have on the overall look and feel of the shower.
The inclusion of visual aids, such as diagrams and photos, really enhances the clarity of your instructions. It’s reassuring to see exactly what each step should look like, which takes some of the guesswork out of the equation.
I also appreciate your mention of common mistakes to avoid during the tiling process. It’s always helpful to know what pitfalls to watch out for, especially for someone like me who is not well-versed in DIY projects.
Overall, your article has not only provided me with the knowledge I need to confidently tile a shower stall but has also sparked my interest in taking on more home improvement projects. Thank you for sharing your expertise in such a comprehensive and accessible way!