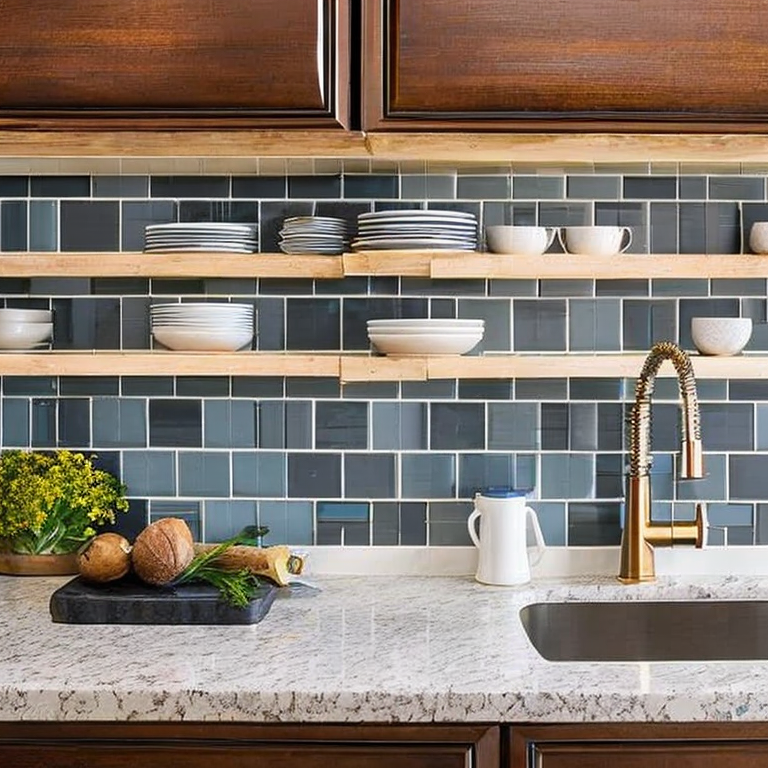
Revamp Your Kitchen with This DIY Backsplash Project
Tiling a kitchen backsplash is a great DIY project that can add a lot of style and personality to your kitchen. Here is a step-by-step guide to help you get started:
1. Gather your tools and materials: You will need tiles of your choice, tile adhesive, tile spacers, a notched trowel, a tile cutter, a level, a measuring tape, a pencil, a sponge, and a grout float.
2. Measure your backsplash area: Use a measuring tape to measure the length and height of the backsplash area. Multiply the two to determine the square footage of the area you need to tile.
3. Choose your tiles: Choose tiles that are suitable for a backsplash area. Ceramic, porcelain, or glass tiles are popular choices as they are durable and easy to clean.
4. Prepare the surface: Make sure the surface is clean, dry and smooth. Use a sandpaper to sand down any rough spots. If there are any existing tiles, remove them and make sure the surface is level.
5. Apply adhesive: Apply tile adhesive to the wall using a notched trowel. Work in small sections, starting from the bottom and working your way up.
6. Place the tiles: Place the tiles on the adhesive, starting from one corner of the backsplash area. Use tile spacers to ensure even spacing between each tile.
7. Cut the tiles: Use a tile cutter to cut tiles to fit around electrical outlets or other obstacles. Make sure to measure carefully before cutting.
8. Allow time for adhesive to dry: Allow the adhesive to dry completely before grouting. This can take between 24-48 hours.
9. Apply grout: Mix grout according to the manufacturer’s instructions and apply it to the tiles using a grout float. Work the grout into the gaps between the tiles, making sure to remove any excess.
10. Clean the tiles: Use a damp sponge to clean any excess grout from the tiles. Allow the grout to dry for 24 hours, then use a dry cloth to buff any remaining haze from the tiles.
Congratulations! You have successfully tiled your kitchen backsplash. With a little patience and attention to detail, your new backsplash will add a beautiful finishing touch to your kitchen.
Tile Troubles? Here’s What You Need to Know
When tiling a kitchen backsplash, there are a number of common and uncommon issues that may arise. Here are a few:
1. Uneven walls: If the walls are not perfectly flat, it can be difficult to lay the tiles evenly. One solution is to use a leveling system to ensure that all tiles are at the same height. Another option is to use a thicker grout line to compensate for the unevenness.
2. Cutting tiles to fit: Depending on the size and layout of your backsplash, you may need to cut tiles to fit around outlets, corners, or other obstacles. A wet saw is the best tool for cutting tiles, but if you don’t have one, you can use a tile cutter or even a scoring tool and snap the tile along the scored line.
3. Grout haze: After the tiles are installed, you may notice a haze or film on the surface of the tiles. This is caused by excess grout that has not been wiped away. To remove the haze, use a grout haze remover or a solution of vinegar and water.
4. Tiles falling off: If your tiles are not adhering properly, it could be because the surface was not cleaned properly before installation, or because the wrong type of adhesive was used. Make sure to use the recommended adhesive for your tile type and follow the manufacturer’s instructions closely.
5. Uncommon issue – uneven grout lines: If you notice that your grout lines are uneven, it may be because the tiles were not installed evenly. One solution is to remove the affected tiles and re-install them, making sure they are level. Another option is to use a grout colorant to even out the appearance of the grout lines.
Tips and advice:
– Measure your backsplash carefully before purchasing tiles to ensure you have enough and don’t end up with awkward cuts or a shortage of tiles.
– Use spacers to ensure even spacing between tiles.
– Take your time and work in small sections to ensure the tiles are laid evenly and the adhesive doesn’t dry too quickly.
– Wear safety equipment such as gloves and eye protection when cutting tiles.
– Use a sealant to protect the grout from staining and moisture damage.
Step Up Your Kitchen Style: Mastering the Art of Tiling
If the reader already knows how to tile a kitchen backsplash, there are several other tiling projects that they can take on. Here are a few ideas:
1. Tiling a bathroom: A bathroom is a great place to experiment with different tile patterns and layouts. You can tile the walls, floors, and even the shower enclosure.
2. Tiling a fireplace: A tiled fireplace can add a lot of character and style to a room. You can use mosaic tiles to create a unique design or stick to classic subway tiles for a clean look.
3. Tiling a feature wall: Adding a tiled feature wall to a room can create an eye-catching focal point. You can use large-format tiles for a modern look or mix and match different tile sizes and shapes for a more eclectic feel.
4. Tiling a patio or outdoor area: If you have an outdoor space that needs some sprucing up, consider tiling it. There are many outdoor tile options available that are durable and weather-resistant.
When taking on these advanced tiling projects, it’s important to remember to plan ahead and measure carefully. You may also need some specialized tools and materials, such as tile saws and grout floaters. Always follow the manufacturer’s instructions and consult with a professional if you’re unsure about any aspect of the project. With a little bit of effort and skill, you can create beautiful and unique tiled spaces throughout your home.
Tags: adhesive, ceramictile, cuttingtile, design, DIY, glasstile, grout, homeimprovement, howto, kitchenbacksplash, layout, materials, measuring, mosaictile, porcelaintile, renovation, step-by-step, subwaytile, tileinstallation, tools
Tweet