Master the Art of Mulching: Unleash Your Garden’s Potential
Title: The Complete Guide to Spreading Mulch: From Basics to Expert Level
Introduction:
Mulching is an essential gardening practice that benefits plants, conserves moisture, suppresses weeds, and enhances the overall aesthetics of your garden. Whether you’re a beginner or an experienced gardener, learning how to spread mulch correctly is crucial. In this comprehensive guide, we will take you through the step-by-step process of spreading mulch, starting from the basics and gradually expanding your knowledge until you become an expert in the field.
Section 1: Understanding Mulch
1.1 What is Mulch?
Mulch refers to any material applied to the soil surface around plants to improve growing conditions. It can be organic or inorganic and comes in various forms such as wood chips, straw, leaves, peat moss, compost, or even stones.
1.2 Why is Mulching Important?
– Mulch conserves moisture by reducing evaporation, thus keeping the soil moist for longer periods.
– It moderates soil temperature, protecting plants’ roots from extreme heat or cold.
– Mulch suppresses weed growth by blocking sunlight and preventing weed seeds from germinating.
– Organic mulches break down over time, enriching the soil with nutrients and improving its structure.
– Mulch acts as an insulator, preventing soil erosion and reducing the impact of heavy rain.
Section 2: Preparing for Mulching
2.1 Assessing Your Garden’s Needs
Before spreading mulch, assess your garden to determine the appropriate type, amount, and timing of mulching required. Consider factors such as plant types, soil conditions, climate, and desired aesthetics.
2.2 Choosing the Right Mulch
Select mulch based on its purpose and your garden’s specific requirements. Organic mulches are recommended for most situations, as they provide additional benefits to the soil as they decompose. Inorganic mulches, such as stones or gravel, are suitable for certain landscape designs.
2.3 Calculating the Quantity
Measure the area you plan to mulch to determine the amount of mulch needed. Most mulch is sold by the cubic yard, so understanding the area’s size will help you calculate the required volume.
2.4 Preparing the Site
Prepare the garden beds by removing weeds, rocks, and other debris. Trim any overhanging branches or plants that may hinder the mulching process.
Section 3: Spreading Mulch
3.1 Applying Mulch
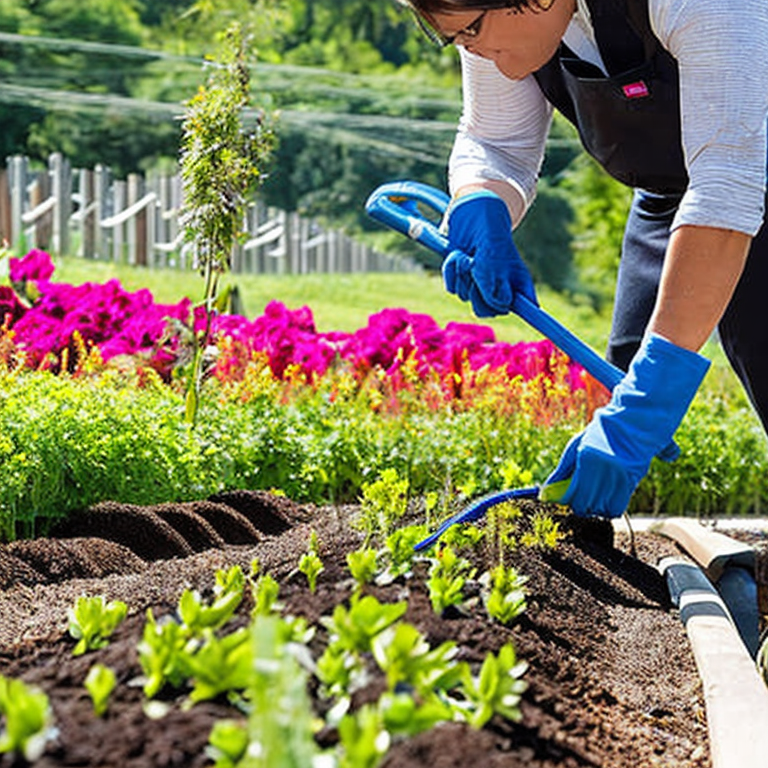
– Start by spreading a layer of mulch that is 2-4 inches thick around your plants and on bare soil. Avoid piling mulch against the plant stems.
– For trees and shrubs, extend the mulch layer to the dripline (the outer edge of the canopy), covering the entire root zone.
– It’s essential to leave a gap between the mulch and the plant stem to prevent rot and discourage pests.
3.2 Mulching Techniques
– The blanket method: Spread mulch evenly over the entire garden bed, ensuring consistent coverage and depth.
– The volcano method: Pile mulch into a cone shape around the base of plants, gradually tapering as you move away. This method is commonly used for trees and shrubs.
3.3 Mulching Young Plants and Seedlings
For newly planted or young plants, create a smaller mulch-free area around the stem to allow for air circulation and prevent root rot.
Section 4: Mulch Maintenance
4.1 Mulch Renewal
As organic mulch decomposes, it may need replenishing annually or biannually. Remove any old mulch before adding a fresh layer.
4.2 Watering and Fertilizing
Remember that mulch acts as a moisture retainer. Adjust your watering schedule accordingly, ensuring the soil doesn’t become overly saturated. Apply fertilizers as recommended for your plants, considering that organic mulches contribute to soil fertility.
Conclusion:
By following this step-by-step guide, you’ve learned the fundamentals of spreading mulch effectively. Remember to assess your garden’s needs, choose the appropriate mulch, prepare the site, and apply the mulch correctly. With time and practice, you’ll become an expert in mulching, reaping the benefits of a healthier, more vibrant garden.
Mulch Matters: Navigating the Bumps on Your Gardening Journey
When spreading mulch, there are several common and uncommon issues that you may encounter. Understanding these issues and knowing how to address them will help ensure a successful and effective mulching process. Here are some of the most common and uncommon issues with solutions, tips, and advice:
1. Issue: Mulch Depth Inconsistency
Solution: Maintain a consistent mulch depth of around 2 to 4 inches throughout your garden beds. Use a rake or shovel to evenly distribute the mulch, ensuring it is not too thick around plants’ stems.
2. Issue: Weed Growth
Solution: Before spreading mulch, remove any existing weeds or grass from the area. Applying a weed barrier or landscape fabric beneath the mulch can also help prevent weed growth. Additionally, regularly inspect your mulched areas and manually remove any emerging weeds.
3. Issue: Mulch Compaction
Solution: Avoid compacting the mulch by not walking or heavy equipment over it. Mulch compaction can prevent water penetration and airflow, leading to plant stress and root rot. Place stepping stones or a pathway to provide access without disturbing the mulch.
4. Issue: Mulch Color Fading
Solution: Natural mulch colors tend to fade over time due to weather exposure. To maintain a fresh appearance, consider periodically fluffing or turning the mulch to expose the vibrant side. Alternatively, top-dressing with a fresh layer of mulch can restore the color and provide additional benefits.
5. Issue: Mulch Attracting Pests
Solution: Some mulch materials, such as wood chips or bark, can attract pests like termites or ants. To prevent this, regularly inspect the mulch for signs of infestation and treat accordingly with pest control measures. Consider using alternative mulch materials like gravel or rubber if pests are a persistent issue.
6. Issue: Mulch Decomposition and Nutrient Depletion
Solution: Organic mulches decompose over time, enriching the soil but eventually depleting nutrients. To counter this, periodically supplement the soil with organic fertilizers or compost. Adding a fresh layer of mulch annually or as needed can also help maintain its benefits and appearance.
7. Issue: Mulch Water Repellency
Solution: In some cases, mulch can become hydrophobic, causing water to run off instead of penetrating the soil. To overcome this issue, break up any compacted mulch layers, aerate the soil, and ensure proper irrigation practices. If necessary, lightly water the mulched area to help it absorb and retain moisture.
8. Issue: Mulch Odor or Mold Growth
Solution: Mulch that is excessively wet or lacks proper airflow can develop an unpleasant odor or promote mold growth. To mitigate this, ensure adequate drainage in your garden beds and avoid overwatering. If mold develops, remove the affected mulch layer and replace it with fresh mulch.
Remember, mulching is a beneficial practice that helps conserve moisture, suppress weeds, regulate soil temperature, and enhance the overall aesthetics of your garden. By addressing and resolving these common and uncommon issues, you can reap the full benefits of mulching and keep your garden healthy and attractive.
Mulch Mastery: Elevate Your Gardening Game!
For advanced users who are already experts in spreading mulch, there are several other projects you can undertake to enhance your outdoor space. Here are a few suggestions along with some advice on how to approach them:
1. Creating Mulch Paths: Instead of simply spreading mulch around plant beds, consider designing and creating mulch paths throughout your garden. Mulch paths can add visual interest and provide a practical solution for walking between different areas of your yard. To create a mulch path, mark out the desired route, remove any existing vegetation, level the ground, and then spread a layer of mulch evenly along the path. Consider using a border material like stones or bricks to define the path and prevent the mulch from spreading onto surrounding areas.
2. Mulching Around Trees: Mulching around trees not only improves the aesthetics but also provides numerous benefits such as moisture retention, weed suppression, and protection against extreme temperatures. To mulch around trees, start by clearing the area around the base of the tree from any existing vegetation. Spread a layer of mulch around the tree, ensuring it is approximately 2-4 inches deep and extends at least a few inches beyond the dripline (outermost edge of the tree’s canopy). Avoid piling mulch against the tree trunk as it can lead to moisture retention and potential rot.
3. Mulching in Sloped Areas: If you have sloped areas in your landscape, mulching can help prevent erosion and provide stability. To mulch in sloped areas, use a coarser mulch material such as wood chips or shredded bark that will better resist movement due to water flow. Start by evenly spreading a layer of mulch along the slope, making sure it is not too thick to avoid runoff. If needed, use temporary erosion control measures like netting or stakes until the mulch settles and the slope stabilizes.
4. Mulching Around Garden Structures: Mulching around garden structures such as pergolas, benches, or decorative features can help integrate them into the overall landscape design. Begin by preparing the ground around the structure, removing any weeds or grass. Spread a layer of mulch around the base, extending it a few inches beyond the structure to create a neat and cohesive look. Consider using a contrasting mulch color or texture to highlight the structure and make it stand out.
5. Creating Mulch Beds and Borders: If you want to experiment with different plant groupings or create defined borders in your garden, consider using mulch as a way to delineate these areas. Prepare the soil and shape the beds or borders as desired, then spread a layer of mulch within the designated areas. This will not only provide a clean and organized look but also help suppress weeds and retain moisture around the plants.
Remember, even as an expert, it’s essential to keep safety in mind. Always wear appropriate protective gear, such as gloves and eye protection, when working with mulch. Additionally, use mulch from sustainable sources and consider organic alternatives to promote a healthy and environmentally friendly garden.
With your expertise in spreading mulch, these advanced projects will allow you to take your gardening skills to the next level and further enhance the beauty and functionality of your outdoor space.
Tags: gardenmulch, mulch, mulchapplication, mulchbenefits, mulchcoverage, mulchdepth, mulchgardening, mulchinstallation, mulchlandscaping, mulchlayering, mulchmaintenance, mulchmaterials, mulchnutrients, mulchtechniques, mulchtools, mulchwaterretention, mulchingtips, organicmulch, spreadingmulch, typesofmulch
Tweet
What a fantastic article on spreading mulch! I’ve always found the process so satisfying and rewarding. The detailed steps outlined here make it seem so easy and enjoyable. I can’t wait to get out in my garden and start mulching. Thank you for sharing such valuable information!