Top Tips For A Warmer Attic This Winter
Attic insulation plays a crucial role in maintaining the overall energy efficiency of your home. If your attic insulation is old, damaged, or not up to the required R-value, then it’s time to replace it. In this guide, we’ll take you through the process of replacing attic insulation step-by-step.
Step 1: Determine the Type of Insulation You Need
The first step in replacing your attic insulation is to determine the type of insulation you need. There are several types of insulation available, including fiberglass, cellulose, and spray foam. Each type has its own pros and cons, so it’s important to choose the right one for your needs. You should also consider the R-value of the insulation, which is a measure of its thermal resistance. The higher the R-value, the more effective the insulation will be at keeping your home warm in winter and cool in summer.
Step 2: Gather Your Tools and Materials
Before you begin, make sure you have all the tools and materials you need. You’ll need safety goggles, gloves, a dust mask, a utility knife, a staple gun, a tape measure, and a ladder. You’ll also need the insulation itself, as well as any additional materials required for installation, such as a vapor barrier.
Step 3: Prepare the Attic
Before you can begin installing your new insulation, you’ll need to prepare the attic. This involves removing any old insulation, debris, or other materials that may be present. You’ll also need to seal any air leaks in the attic to prevent heat loss or gain.
Step 4: Install the New Insulation
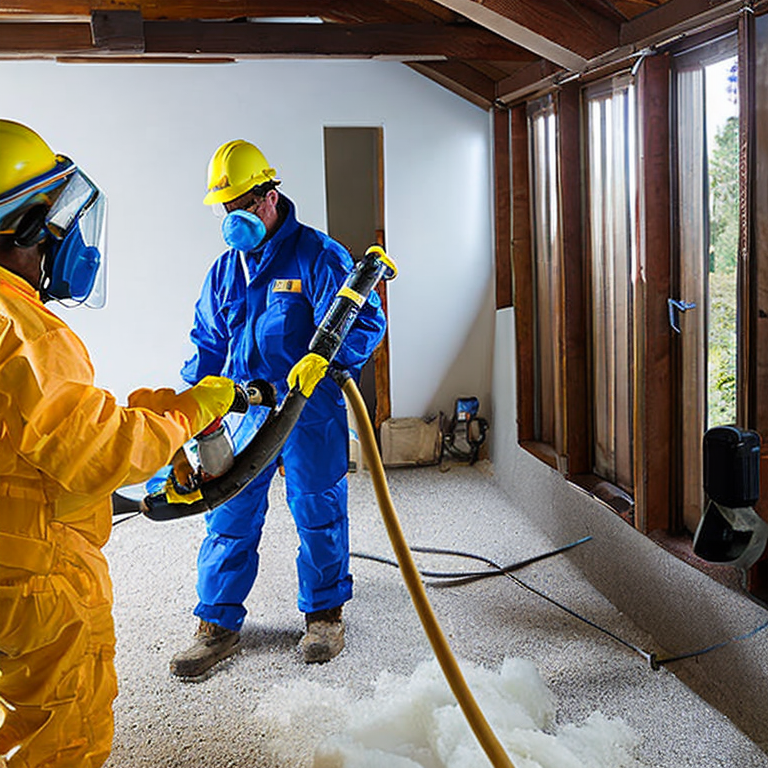
Once the attic is prepared, you can begin installing the new insulation. If you’re using fiberglass insulation, you’ll need to roll it out and cut it to size using a utility knife. Be sure to wear gloves and a dust mask to protect yourself from the fiberglass particles. If you’re using cellulose insulation, you’ll need to blow it into the attic using a special machine. Spray foam insulation is applied using a spray gun.
Step 5: Install a Vapor Barrier
If your insulation requires a vapor barrier, now is the time to install it. A vapor barrier helps prevent moisture from entering your home and causing damage. It should be installed over the insulation and stapled in place.
Step 6: Clean Up and Inspect
Once the insulation is installed, you should clean up any debris or dust that may have accumulated. You should also inspect the insulation to ensure that it’s evenly distributed and that there are no gaps or areas of compression.
In conclusion, replacing attic insulation is a relatively straightforward process that can greatly improve the energy efficiency of your home. By following these steps and taking the time to choose the right type of insulation, you can enjoy a more comfortable home and lower energy bills.
Insulate your attic like a pro: avoid these mistakes
When replacing attic insulation, there are several issues that one may encounter. Some of the most common ones include:
1. Moisture: If there is moisture in the attic, it can cause the insulation to become damp and lose its effectiveness. This can also lead to mold growth and other issues. The solution to this is to identify the source of the moisture and fix it before installing new insulation. It is also important to make sure that the attic is properly ventilated to prevent moisture buildup.
2. Pests: Attics are often home to rodents and other pests, which can damage the insulation and create health hazards. To prevent this, it is important to seal all entry points and use pest-resistant insulation.
3. Uneven insulation: If the old insulation was not installed evenly, it can create air pockets that reduce its effectiveness. To solve this, it is important to remove the old insulation and install new insulation evenly throughout the attic.
4. Inadequate insulation: If the old insulation was not thick enough or made from the right material, it may not provide sufficient protection against heat loss and gain. The solution to this is to choose the right type of insulation for the climate and to install it to the recommended thickness.
Some of the uncommon issues that may arise include:
1. Asbestos: If the old insulation contains asbestos, it can pose a health hazard when disturbed. It is important to hire a professional to remove the old insulation safely.
2. Wiring and ductwork: If there are wires and ductwork in the attic, they can be difficult to work around and can create safety hazards. It is important to make sure that all electrical wiring is properly installed and that ductwork is properly insulated.
3. Structural issues: If there are structural issues in the attic, such as sagging or rotting beams, they will need to be addressed before installing new insulation. It is important to hire a professional to assess and repair any structural issues.
Tips and advice for replacing attic insulation:
1. Wear protective gear, such as gloves and a mask, when working with insulation.
2. Make sure to seal all entry points and gaps in the attic to prevent pests and moisture from entering.
3. Choose the right type of insulation for your climate and make sure to install it to the recommended thickness.
4. Consider hiring a professional to assess and address any uncommon issues, such as asbestos or structural issues.
5. Properly ventilate the attic to prevent moisture buildup and improve the effectiveness of the insulation.
Upgrade Your Attic’s Comfort: Insulation Installation Made Easy
For advanced users who are already experts in replacing attic insulation, there are a number of other projects that can significantly improve the energy efficiency and comfort of their homes. Here are a few ideas:
1. Air sealing: Even with new insulation in place, air leaks can still occur, reducing the effectiveness of insulation and leading to drafts and uneven temperatures. Advanced users can use tools like a blower door or infrared camera to locate air leaks, and then seal them with caulking, weatherstripping, or spray foam.
2. Duct sealing: In homes with central heating and cooling systems, ductwork can be a major source of energy loss. Advanced users can use duct sealant or mastic to seal leaks in ductwork, improving the efficiency of the HVAC system and reducing energy bills.
3. Radiant barriers: In hot climates, radiant barriers can help to reflect heat away from the attic space, reducing the strain on air conditioning systems and keeping the home more comfortable. Advanced users can install reflective foil barriers over the top of insulation to achieve this effect.
4. Ventilation improvements: Adequate ventilation is important in the attic to prevent moisture buildup and reduce the risk of mold and mildew. Advanced users can install new vents or improve existing ones to ensure that air is flowing properly through the attic space.
5. Insulating other areas of the home: While attic insulation is important, it’s not the only place where heat can escape or enter the home. Advanced users can also install insulation in walls, floors, and crawl spaces to create a more complete thermal envelope.
When undertaking these projects, it’s important to follow all safety guidelines and building codes, and to use appropriate tools and equipment. Advanced users should also consider consulting with a professional contractor or energy auditor to ensure that they’re making the most effective improvements to their home’s energy efficiency.
Tags: airsealing, attic, atticaccess, atticfloor, atticinsulation, atticinsulationcost., cellulose, DIYinsulation, energyefficiency, fiberglass, heatingandcooling, homeimprovement, insulationcontractor, insulationinstallation, insulationmaterials, insulationR-value, insulationremoval, replace, sprayfoam, ventilation
Tweet