Unleash the Saucy Secrets: Mastering the Art of Gravy
Making gravy is a skill that can elevate any meal to the next level. It is a versatile and delicious sauce that can be enjoyed with various dishes like roasted meats, mashed potatoes, and even biscuits. In this guide, we will start from the basics and gradually expand to help you become an expert at making gravy.
Gravy is essentially a sauce made from the drippings of cooked meat, combined with a thickening agent and flavorful seasonings. The drippings are the juices that come out of the meat while it cooks, usually in a roasting pan or skillet.
To make gravy, you will need the following ingredients:
– Meat drippings (from roasting or cooking meat)
– All-purpose flour or cornstarch (as a thickening agent)
– Broth or stock (chicken, beef, or vegetable – depending on the meat you cooked)
– Seasonings (salt, pepper, herbs, and spices – depending on your taste preferences)
Now, let’s dive into the step-by-step process of making gravy:
1. Start by collecting the meat drippings: Once you have finished cooking your meat, such as a roast chicken or beef, remove it from the pan or skillet. Place the pan on the stovetop over medium heat. The drippings will be the flavorful liquid left at the bottom of the pan.
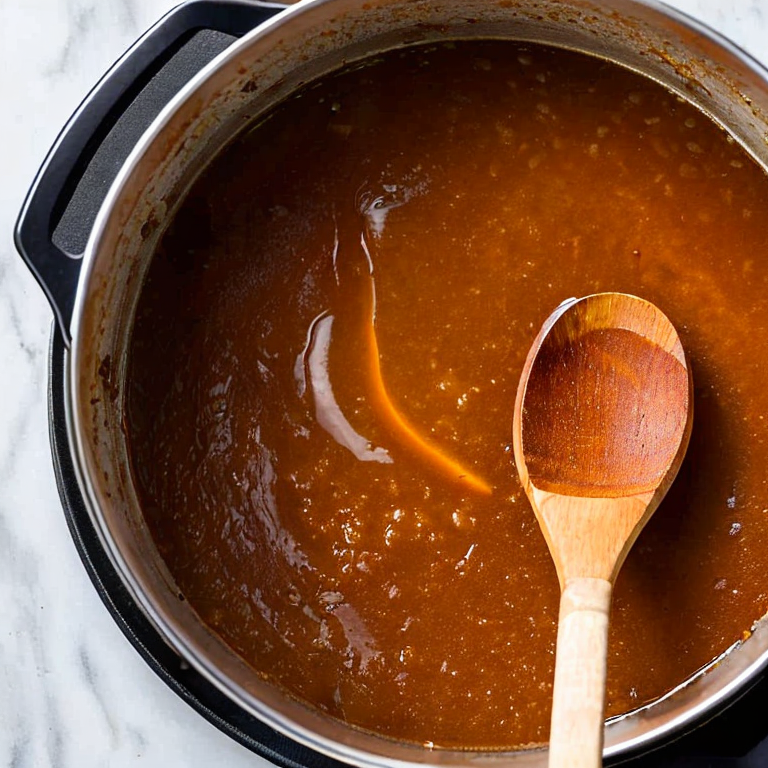
2. Deglaze the pan: To enhance the flavor of your gravy, you can deglaze the pan. This means adding a liquid like broth or stock to the hot pan and scraping off any browned bits stuck to the bottom. This process helps to incorporate those delicious flavors into your gravy. Use a wooden spoon or spatula to scrape the pan gently.
3. Strain the drippings: To remove any impurities or solid bits, strain the collected drippings into a separate container using a fine-mesh strainer or cheesecloth. This step ensures a smooth and velvety texture for your gravy.
4. Prepare a roux: A roux is a mixture of fat (in this case, the meat drippings) and a thickening agent, which is usually flour or cornstarch. In a separate saucepan, melt a small amount of butter or use the meat drippings you collected. Gradually add in an equal amount of flour or cornstarch, stirring continuously until the mixture becomes smooth and thick.
5. Cook the roux: Keep cooking the roux over medium heat, stirring constantly to prevent burning. This step helps to cook out the raw flavor of the flour or cornstarch, resulting in a nutty and rich taste. Cook until the roux turns a light golden color, which may take a few minutes.
6. Gradually add the broth or stock: Slowly pour in the broth or stock, while whisking constantly to avoid lumps. The amount of liquid will depend on how much gravy you want to make and the desired thickness. Generally, 1 cup of liquid is a good starting point. Continue whisking until the mixture is well combined and smooth.
7. Season to taste: Now it’s time to add the seasonings. Start with a pinch of salt and pepper, and then adjust according to your preference. You can also incorporate herbs like thyme, rosemary, or spices like garlic powder or paprika to enhance the flavor. Remember to taste as you go and make adjustments accordingly.
8. Simmer and thicken: Bring the gravy to a gentle simmer over low heat, stirring occasionally. As it simmers, the gravy will gradually thicken. This process allows the flour or cornstarch to fully cook and thicken the sauce.
9. Adjust consistency: If your gravy is too thick, you can thin it out by adding a small amount of broth or water. On the other hand, if it’s too thin, you can create a slurry by mixing equal parts flour or cornstarch with cold water and slowly stirring it into the gravy. Allow the gravy to simmer for a few more minutes after making any adjustments.
10. Serve and enjoy: Once your gravy has reached the desired consistency and flavors have melded together, it’s ready to be served. Pour it over your favorite dishes like roast chicken, mashed potatoes, or biscuits.
Congratulations! You are now equipped with the knowledge to make delicious homemade gravy. Remember, practice makes perfect, so don’t be afraid to experiment with different flavors and techniques to create your signature gravy. Enjoy the process and the tasty results!
Gravy Woes: Untangling the Messy Mistakes in Your Kitchen!
When making gravy, there are several common and uncommon issues that can arise. However, with some tips and advice, you can easily overcome these challenges. Here are some of the most common issues and their solutions:
1. Lumps in the gravy: Lumps can form if the flour or cornstarch is not properly mixed with the liquid. To avoid this, make sure to whisk the thickening agent (flour, cornstarch, etc.) with a small amount of cold liquid before adding it to the hot mixture. This creates a smooth slurry that can be gradually added to the gravy while whisking continuously.
2. Thin or watery gravy: If your gravy turns out too thin or watery, it may be due to insufficient thickening. To fix this, create a slurry by mixing equal parts flour or cornstarch with cold water or broth. Gradually whisk this slurry into the simmering gravy and allow it to cook for a few more minutes until desired thickness is achieved.
3. Overly thick gravy: On the other hand, if your gravy becomes too thick, you can thin it out by adding more liquid such as broth, stock, or even water. Gradually add the liquid while whisking continuously, until the desired consistency is reached.
4. Lack of flavor: Sometimes, gravy can taste bland. To enhance the flavor, you can use pan drippings from roasted meat, such as turkey or beef, as the base for your gravy. Additionally, season the gravy with salt, pepper, herbs, or spices to suit your taste. You can also add a splash of Worcestershire sauce or soy sauce for added depth of flavor.
5. Greasy gravy: If your gravy appears greasy, it may be due to excessive fat. You can remove some of the fat by using a fat separator or by skimming the fat off the top with a spoon. Another option is to refrigerate the gravy until the fat solidifies on the surface, then remove and discard it before reheating.
Now, let’s address some less common issues:
6. Bitter taste: A bitter taste in gravy can result from burnt or overcooked ingredients. To salvage the gravy, try adding a pinch of sugar or a small amount of acid (such as lemon juice or vinegar) to counteract the bitterness. Taste and adjust as needed.
7. Grainy texture: Occasionally, gravy can have a grainy texture, especially if the flour or cornstarch is not fully dissolved. To fix this, strain the gravy through a fine-mesh sieve to remove any grainy bits, then reheat and serve.
8. Color inconsistency: If your gravy has uneven color or appears pale, it may be due to inadequate browning of the flour or lack of flavorful ingredients. Consider using roasted meat drippings or adding a small amount of caramelized onions or tomato paste to enhance the color and depth.
Remember, practice makes perfect when it comes to making gravy. Don’t be discouraged by occasional mishaps, and feel free to experiment with different flavors and techniques to find your preferred gravy recipe.
Master the Art of Gravy Making: Elevate Your Skills!
If you’re already an expert in making gravy, congratulations! It’s time to take your culinary skills to the next level and explore new projects in the kitchen. Here are a few suggestions to challenge yourself and expand your repertoire:
1. Master Homemade Pasta: Making your own pasta from scratch can be a rewarding and delicious experience. Invest in a pasta machine or learn to roll it out by hand. Experiment with different shapes, flavors, and sauces to enhance your pasta-making skills.
2. Explore Fermentation: Dive into the world of fermentation and learn how to make your own kimchi, sauerkraut, kombucha, or sourdough bread. This ancient preservation technique not only adds unique flavors to your meals but also offers numerous health benefits.
3. Dive into Bread Baking: If you haven’t already, delve into the art of bread baking. From crusty baguettes to fluffy brioche, there is a vast array of bread recipes and techniques to explore. Experiment with different types of flour, starters, and flavors to create your own signature loaves.
4. Master the Art of Charcuterie: Take on the challenge of curing your own meats, such as bacon, prosciutto, or salami. This project requires patience and precision as you learn about different curing methods, spices, and aging techniques.
5. Create Artisanal Cheese: Cheese-making is a complex craft that can be incredibly rewarding. Start with simple soft cheeses like ricotta or mozzarella and gradually progress to more intricate varieties like cheddar or camembert. Experiment with aging and flavoring to develop your unique cheese profiles.
6. Dive into Molecular Gastronomy: If you’re truly up for a challenge, explore the world of molecular gastronomy. This cutting-edge culinary approach involves using scientific techniques to transform ingredients and create unique textures, flavors, and presentations. It requires a deep understanding of food chemistry and experimentation.
Remember to approach these advanced culinary projects with patience, practice, and a willingness to learn from your experiences. Don’t be afraid to make mistakes along the way; they often lead to the most valuable lessons. Happy cooking!
Tags: beefgravyrecipe, chickengravyrecipe, comfortfoodgravy, creamygravy, deliciousgravy, easygravyrecipe, flavorfulgravy, gluten-freegravyrecipe, gravy, gravyrecipe, holidaygravy, homemadebrowngravy, homemadegravy, homemadegravyrecipe, richgravy, savorygravy, Thanksgivinggravy, thickgravy, turkeygravyrecipe, vegetariangravyrecipe
Tweet