Wrap Yourself in Cozy Creativity: Unravel the Art of Scarf Knitting!
Title: The Ultimate Guide: Learn How to Knit a Scarf
Introduction:
Knitting is a timeless craft that allows you to create beautiful and cozy items, like scarves. Whether you’re a complete beginner or have some experience with knitting, this comprehensive guide will take you through the step-by-step process of knitting a scarf. By the end, you’ll have the knowledge and skills to create your very own scarf and even explore more advanced knitting techniques.
Materials Needed:
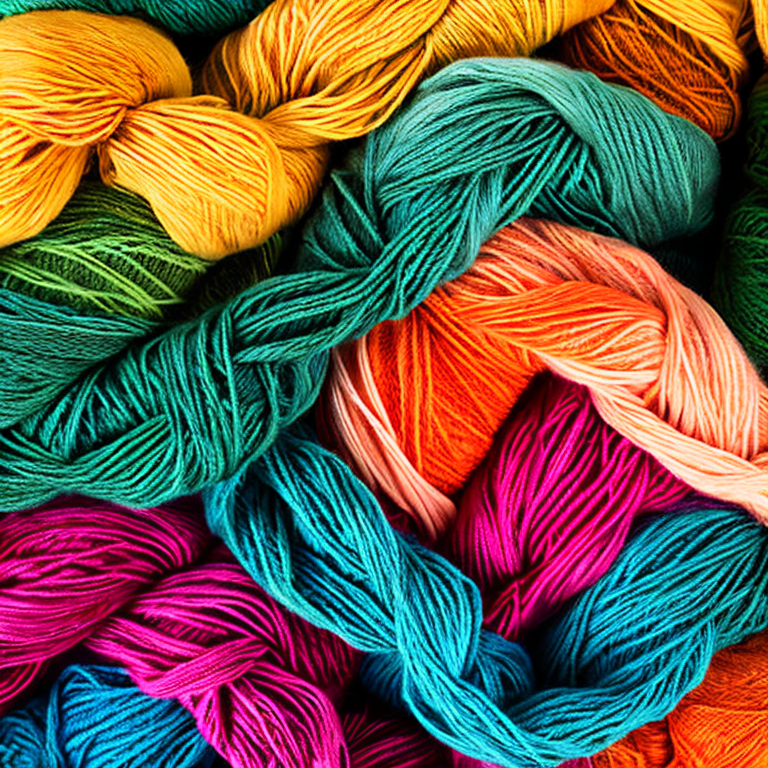
1. Yarn: Choose a soft and chunky yarn suitable for scarves. Acrylic or wool blends are great options for beginners.
2. Knitting needles: Select a pair of needles that match the recommended size for your yarn. Start with size 8 or 9 (5-6 mm) needles for a medium-weight yarn.
3. Scissors: Used to cut the yarn at the end.
4. Tapestry needle: Helps weave in loose ends.
Step 1: Casting On
1. Hold one knitting needle in your dominant hand.
2. Make a slipknot by creating a loop with the yarn, leaving a 6-inch tail.
3. Insert the needle into the loop and pull the yarn to tighten the knot around the needle.
4. Slide the slipknot up to the top of the needle, leaving a little space.
5. Hold the needle with the slipknot in your non-dominant hand.
Step 2: Knitting the First Row
1. Hold the yarn attached to the ball in your non-dominant hand.
2. Insert your dominant hand needle through the slipknot from left to right, going under the non-dominant hand needle.
3. Wrap the yarn around your dominant hand needle, moving counterclockwise.
4. Pull the yarn through the slipknot, creating a new loop on the dominant hand needle.
5. Slip the old loop off the non-dominant hand needle.
6. Repeat steps 2-5 until you’ve completed a row of stitches. This is called the knit stitch.
Step 3: Continuing the Knit Stitch
1. Hold the needle with the stitches in your non-dominant hand.
2. Insert your dominant hand needle into the first stitch on the non-dominant hand needle, from left to right.
3. Wrap the yarn counterclockwise around the dominant hand needle.
4. Pull the yarn through the stitch, creating a new loop on the dominant hand needle.
5. Slip the old stitch off the non-dominant hand needle.
6. Repeat steps 2-5 until you’ve completed several rows. This creates the fabric of the scarf.
Step 4: Changing Yarn Colors or Adding New Yarn
1. To change colors, leave a 6-inch tail of the old color and begin knitting with the new color. Later, weave in the loose ends.
2. To add new yarn, ensure you still have a few inches of the previous yarn attached, then simply start knitting with the new yarn. Weave in the loose ends later.
Step 5: Measuring and Shaping the Scarf
1. Lay your knitting flat on a surface and measure its width to ensure consistency.
2. Continue knitting until the scarf reaches your desired length. A typical scarf is approximately 60-70 inches long.
3. To shape the scarf, you can experiment with different stitch patterns, such as ribbing, garter stitch, or seed stitch. These patterns add texture and visual interest to your scarf.
Step 6: Binding Off
1. Knit the first two stitches.
2. Insert the left needle into the first stitch on the right needle.
3. Lift the first stitch over the second stitch, dropping it off the needle.
4. Knit one stitch.
5. Lift the first stitch over the second stitch again.
6. Repeat steps 4-5 until you have one stitch remaining.
7. Cut the yarn, leaving a 6-inch tail, and thread it through the last stitch, pulling it tight to secure.
Step 7: Finishing Touches
1. Use a tapestry needle to weave in any loose ends by threading them through the stitches on the backside of the scarf.
2. Block your finished scarf by lightly misting it with water and laying it flat to dry. This will help even out the stitches and give the scarf a more polished look.
Conclusion:
Congratulations! You’ve successfully learned how to knit a scarf from start to finish. With practice, you’ll become more comfortable with the techniques and can explore different yarns, stitch patterns, and even experiment with adding decorative elements like fringe. Knitting a scarf is a rewarding and relaxing hobby that allows you to create personalized accessories or thoughtful gifts for your loved ones. Enjoy your newfound knitting expertise!
Untangling the Threads: Navigating Hiccups in Scarf Knitting
When knitting a scarf, there are several common and uncommon issues that knitters may encounter. Here are some of the most frequent problems and their solutions, along with tips and advice to help you overcome them:
1. Uneven tension: Uneven tension often results in a scarf that has varying stitch sizes or looks lopsided. To achieve consistent tension, practice knitting with a relaxed grip and try not to pull the yarn too tightly. Taking breaks during knitting can also help prevent tension issues.
2. Dropped stitches: Dropped stitches can be frustrating, but they are fixable. If you notice a dropped stitch, use a crochet hook or a knitting needle to pick up the dropped stitch and work it back into place. Alternatively, you can use a lifeline—a contrasting color yarn threaded through a row of stitches—to make it easier to fix mistakes.
3. Twisted stitches: Twisted stitches occur when a stitch is mounted incorrectly on the needle, resulting in a twisted appearance. Pay attention to the orientation of the stitches as you work to ensure they are not twisted. If you notice a twisted stitch, you can easily fix it by unraveling the stitch and reinserting the needle correctly.
4. Edges rolling up: Sometimes, the edges of a knitted scarf tend to roll up, making it difficult to lay flat. To prevent this, you can add a border or use a different stitch pattern for the edges, such as garter stitch or seed stitch. Blocking your finished scarf can also help relax the fibers and minimize rolling.
5. Yarn tangling: Yarn tangling can be a common issue, especially if you are working with multiple balls of yarn or using yarn that has a tendency to split. To avoid tangling, make sure your yarn is organized and not twisted around each other. You can use yarn bowls, project bags, or even homemade yarn holders to keep the yarn from tangling.
6. Running out of yarn: Running out of yarn before completing your scarf can be disappointing. To estimate the amount of yarn needed, check the pattern gauge and yardage requirements. It’s always a good idea to buy extra yarn to ensure you have enough. If you do run out, you can try finding a similar yarn to complete your project, or you can get creative and add a contrasting color or design element to the scarf.
7. Boredom or lack of motivation: Knitting a scarf can be a time-consuming project, and sometimes, you may lose interest or motivation along the way. To combat boredom, consider choosing a pattern that incorporates different stitch patterns or techniques to keep things interesting. You can also set small goals, take breaks, or even knit with friends to stay motivated.
Remember, practice makes perfect when it comes to knitting. Don’t be discouraged by mistakes or challenges. With time and patience, you’ll become more skilled and confident in knitting scarves and other projects. Enjoy the process and embrace the creativity knitting offers!
Master the Art of Scarf Knitting: Level Up Your Skills!
For advanced knitters who have mastered the art of scarf knitting, the possibilities are truly endless! Here are a few project ideas to inspire your next knitting adventure:
1. Sweaters and Cardigans: Take your knitting skills to the next level by tackling a sweater or cardigan project. There are countless patterns available online or in knitting books that cater to different skill levels. Look for patterns that incorporate various techniques such as cables, lace, or colorwork to challenge yourself.
2. Hats and Beanies: Knitting hats and beanies can be a fun and practical project. Experiment with different stitch patterns, color combinations, and yarn weights to create unique designs. You can also explore advanced techniques like Fair Isle or stranded knitting to add intricate patterns to your hats.
3. Socks: Knitting socks can be a rewarding challenge for advanced knitters. There are patterns available for different styles, including ankle socks, crew socks, and knee-high socks. Dive into the world of intricate heel turns, toe shaping, and stitch patterns to create cozy and personalized socks.
4. Shawls and Wraps: Shawls and wraps offer a great opportunity to showcase your knitting skills. Explore lace knitting techniques, intricate stitch patterns, or even experiment with different yarn textures to create stunning accessories. These projects serve as beautiful gifts or versatile additions to your wardrobe.
5. Toys and Amigurumi: If you’re looking for something whimsical and playful, consider knitting toys or amigurumi. From stuffed animals to dolls, there are various patterns available that allow you to showcase your creativity and knitting expertise. Get adventurous with shaping and color choices to bring these cuddly creatures to life.
Tips for Advanced Knitters:
1. Push Your Boundaries: As an advanced knitter, don’t be afraid to try new techniques and patterns that challenge you. This is an opportunity to expand your skills and grow as a knitter. Don’t shy away from complex patterns or unfamiliar stitch techniques – embrace them as learning experiences.
2. Explore Different Fibers: Experiment with different types of yarn to add variety to your projects. Try working with luxury fibers like alpaca, cashmere, or silk to experience the unique qualities they bring to your knitting. You can also explore sustainable or hand-dyed yarn options to support small businesses and add an extra touch of creativity to your creations.
3. Share Your Knowledge: If you’ve become an expert in knitting, consider sharing your knowledge with others. Teach knitting classes, write tutorials, or start a knitting blog. Sharing your expertise not only helps others but also deepens your own understanding of the craft.
Remember, knitting is a journey of continuous learning and growth. Embrace challenges, celebrate your accomplishments, and enjoy the process of creating beautiful knitted pieces!
Tags: cozyscarf, DIY, fashionaccessories, handmade, knit, knitting, knittingaccessories, knittingcommunity, knittingforbeginners, knittinginspiration, knittingpatterns, knittingproject, knittingsupplies, knittingtechniques, knittingtips, knittingtutorial, scarf, winterfashion, wool, yarn
Tweet
Wow, I cannot believe how amazing this blog post is! As someone who is absolutely passionate about knitting, I am always on the lookout for new projects to dive into. And let me tell you, this article on how to knit a scarf is an absolute gem!
The author’s step-by-step instructions are so clear and concise that even a novice like me can follow along without any trouble. I love how they break down the process into manageable chunks, making it easier to grasp for beginners. The detailed explanations, along with the accompanying photos, really help to bring the project to life.
But what sets this article apart is the author’s personal touch. They share their own experiences, tips, and tricks, giving the whole post a genuine and relatable feel. It’s like having a knitting mentor right there with you, guiding you every step of the way.
One thing that really stood out to me was the author’s emphasis on choosing the right yarn for the scarf. They provide valuable insights on different types of yarn, their textures, and how they can affect the final product. This attention to detail is what makes this blog post a cut above the rest.
Overall, I am incredibly grateful for stumbling upon this article. It has not only inspired me to start knitting a scarf but has also given me the confidence and knowledge to tackle more complex knitting projects in the future. Thank you so much for sharing your expertise and passion with us!