Peach Perfection: Master the Art of Canning Your Own!
Sure! I’d be happy to guide you through the process of canning peaches, starting from the basics and gradually expanding your knowledge. By the end, you’ll be an expert in canning peaches!
1. Introduction to Canning:
Canning is a food preservation method that involves sealing fruits or vegetables in airtight containers to prevent spoilage and maintain their quality for an extended period. By canning peaches, you can enjoy their delicious taste and nutritional value long after the harvest season.
2. Equipment and Ingredients:
To get started, gather the necessary equipment and ingredients:
– Fresh peaches: Choose ripe, firm, and blemish-free peaches for the best results.
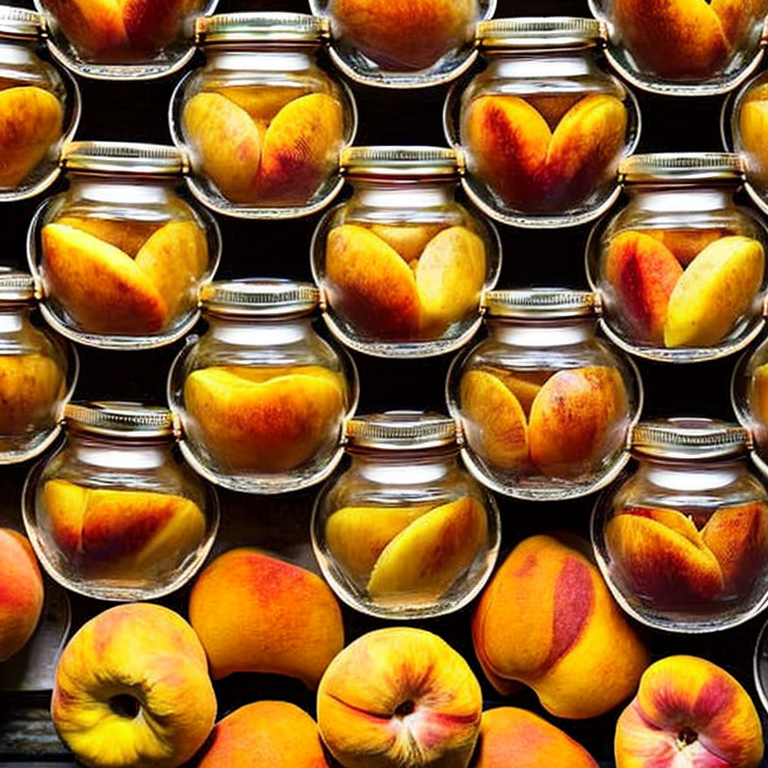
– Canning jars: Use glass jars specifically designed for canning, with airtight lids and screw bands.
– Canning pot or large stockpot: This is used for the water bath canning method.
– Canning rack or a heatproof silicone trivet: To keep the jars elevated from direct contact with the pot’s bottom.
– Canning utensils: Including a jar lifter, magnetic lid lifter, canning funnel, and bubble remover/headspace tool.
– Sugar (optional): Used to enhance the natural sweetness of the peaches.
– Lemon juice or ascorbic acid: To prevent browning of the peaches.
– Water: For making the syrup and the water bath canning process.
3. Preparing the Peaches:
– Wash the peaches thoroughly to remove any dirt or debris.
– Blanch the peaches briefly in boiling water for about 30-60 seconds.
– Transfer the blanched peaches to an ice bath to stop the cooking process.
– Once cooled, peel the peaches by gently rubbing the skin; it should easily come off.
– Cut the peaches in half, remove the pits, and slice them into desired sizes. You can also leave them halved if preferred.
4. Preparing the Syrup:
– The syrup helps preserve the peaches’ texture, flavor, and color.
– Choose the syrup strength based on your preference:
– Light syrup: Mix 2 ¼ cups of water with ½ cup of sugar.
– Medium syrup: Mix 3 cups of water with ¾ cup of sugar.
– Heavy syrup: Mix 4 ¼ cups of water with 1 ¼ cups of sugar.
– Heat the syrup in a pot until the sugar dissolves completely. Keep it hot until ready to use.
5. Filling the Jars:
– Start by placing your clean jars on a towel or heatproof surface.
– If desired, you can preheat the jars by placing them in a canner filled with hot water.
– Fill each jar with peach slices, leaving a recommended headspace of ½ inch.
– Gently shake the jars to settle the peaches and remove any air bubbles.
– Add the hot syrup to the jars, ensuring all the peaches are covered, leaving the appropriate headspace as recommended for your specific recipe (usually ½ inch).
6. Sealing the Jars:
– Wipe the jar rims with a clean, damp cloth to remove any syrup or residue.
– Place the lids in a small saucepan with simmering water to soften the sealing compound.
– Using the magnetic lid lifter, remove the lids from the hot water and place them on the jars.
– Screw the bands onto the jars until they are finger-tight.
– Avoid overtightening, as air needs to escape during processing.
7. Processing the Jars:
– Place the filled and sealed jars on a canning rack or heatproof trivet inside the canning pot.
– Add enough hot water to the pot, covering the jars with at least 1-2 inches of water.
– Bring the water to a rolling boil and start the processing time.
– The processing time depends on your altitude and the jar size, usually ranging from 20-30 minutes.
– Once the processing time is complete, turn off the heat and let the jars sit in the hot water for 5 minutes.
– Carefully remove the jars from the pot using the jar lifter and place them on a towel or cooling rack.
– Allow the jars to cool undisturbed for 12-24 hours.
8. Testing the Seal and Storing:
– After the jars have cooled, check if the lids are properly sealed by pressing down on the center of each lid. If it doesn’t flex or make a popping sound, it’s sealed.
– If any jars did not seal correctly, refrigerate and consume them within a few days.
– Label the sealed jars with the date and store them in a cool, dark place like a pantry.
– Properly sealed jars can be stored for up to one year, but they are best consumed within 8-12 months for the highest quality.
Congratulations! You are now well-versed in the art of canning peaches. Remember, practice makes perfect, so don’t be discouraged if your first attempt isn’t flawless. With time and experience, you’ll become an expert canner, creating delicious jars of preserved peaches to enjoy throughout the year. Happy canning!
From Peach Pitfalls to Perfect Preserves: Troubleshooting Tips Unveiled!
When it comes to canning peaches, there are a few common and uncommon issues that can arise. Let’s take a look at them along with some solutions, tips, and advice:
1. Common Issue: Peaches turning brown during canning.
Solution: Browning occurs due to exposure to air. To prevent this, try treating the peaches with an ascorbic acid solution before canning. You can make your own solution by dissolving 1 teaspoon of ascorbic acid in 1 quart of water. Alternatively, you can use lemon juice or vitamin C tablets to achieve similar results.
2. Common Issue: Peaches floating in the jars.
Solution: Floating occurs when there is too much air trapped within the jars. To minimize floating, make sure to pack the peaches tightly in the jars, leaving as little headspace as possible. Additionally, gently tapping the jars on a towel-covered surface after filling can help remove any air bubbles.
3. Uncommon Issue: Mold growth on the surface of canned peaches.
Solution: Mold growth can occur if the jars were not properly sterilized or if the peaches were not processed for an appropriate amount of time. To prevent mold, ensure that the jars, lids, and utensils are thoroughly cleaned and sterilized before use. Follow the recommended processing time for canning peaches based on your altitude and the size of the jars.
4. Uncommon Issue: Peaches losing their flavor after canning.
Solution: This can happen if the peaches used for canning were not fully ripe or if they were overripe. To ensure the best flavor, choose peaches that are ripe but still firm. Overripe peaches tend to become mushy during canning and lose some of their flavor. Taste the peaches before canning to ensure they are sweet and flavorful.
Tips and Advice:
– Select peaches that are free from bruises or blemishes for the best results.
– Blanching the peaches before peeling can make the process easier.
– Use proper canning techniques, such as hot water bath canning or pressure canning, depending on the recipe and altitude.
– Label your jars with the date of canning to keep track of freshness.
– Store canned peaches in a cool, dark place to maintain quality and shelf life.
Remember, it’s important to follow tested canning recipes and guidelines to ensure the safety and quality of your canned peaches.
Mastering the Art of Peaches: A Delectable Journey Unveiled
If you’re already an expert in canning peaches and looking for new projects to explore, there are several other exciting canning ideas you can consider. Here are a few suggestions to take your expertise to the next level:
1. Experiment with different fruit varieties: While peaches are delicious, don’t limit yourself to just one type of fruit. Explore canning other fruits like pears, cherries, apricots, or even exotic options like mangoes or pineapple. Each fruit has its own unique flavor profile and canning requirements, so be sure to research the specific techniques and recipes for each.
2. Create custom fruit preserves: Instead of simply canning whole fruits, you can venture into making fruit preserves like jams, jellies, and marmalades. These involve cooking the fruits with sugar, pectin, and sometimes additional flavorings like herbs, spices, or citrus zest. The key is to find the right balance of flavors and textures to create a delicious spread for your morning toast or desserts.
3. Explore pickling vegetables: Pickling vegetables is another fantastic canning project for advanced users. You can pickle a wide variety of vegetables like cucumbers, carrots, radishes, beets, green beans, and more. Experiment with different pickling brines, spices, and vinegar options to achieve unique flavor combinations that suit your taste.
4. Make homemade salsas and sauces: Take advantage of the abundance of fresh produce during the harvest season and create your own homemade salsas and sauces. Whether it’s a classic tomato salsa, a fiery hot sauce, or a tangy barbecue sauce, canning these condiments will allow you to enjoy their flavors throughout the year. Remember to follow proper canning guidelines and adjust acidity levels for safe preservation.
5. Try canning soups and stews: Canning soups and stews can be a convenient way to have a homemade meal ready to go whenever you need it. Prepare your favorite soup or stew recipes, leaving out any ingredients that may not withstand the canning process (like dairy). Pressure canning is typically required for these recipes to ensure food safety.
6. Preserve homemade sauces and marinades: If you have perfected your own signature sauces or marinades, why not preserve them in jars? This way, you can enjoy your favorite flavors whenever you need them. Consider canning homemade pesto, pasta sauces, chutneys, or even infused oils. Ensure you follow approved canning methods to maintain safety and shelf life.
Remember, no matter how experienced you are in canning, it’s essential to stay updated on safe canning practices, processing times, and storage guidelines. Always consult reliable sources such as the National Center for Home Food Preservation or reputable canning books for the most up-to-date information.
By exploring these advanced canning projects, you’ll not only expand your repertoire but also have a pantry stocked with a variety of homemade, delicious, and preservative-free goodies. Enjoy the journey of preserving and savoring the flavors of each season!
Tags: canning, canningequipment, canningjars, canningmethods, canningpeaches, canningprocess, canningrecipes, canningsupplies, canningtechniques, canningtips, foodpreservation, fruit, fruitpreservation, harvest., homecanning, homemade, peaches, preserving, recipe, summer
Tweet