Revolutionize Your Garden: Master the Art of Compost Tumbling
Title: The Ultimate Guide to Building Your Own Compost Tumbler
Introduction:
Composting is a fantastic way to reduce waste, nourish your garden, and contribute to a healthier environment. One of the most effective methods of composting is using a compost tumbler. In this comprehensive guide, we will take you through the step-by-step process of building your very own compost tumbler from scratch. By the end, you’ll have all the knowledge and skills to become an expert composter!
1. Understanding Compost Tumblers:
A compost tumbler is a container designed to hold organic waste materials and allow for easy turning or tumbling. The tumbling action accelerates the decomposition process, resulting in faster compost production. Before we start building, let’s understand the key components of a compost tumbler:
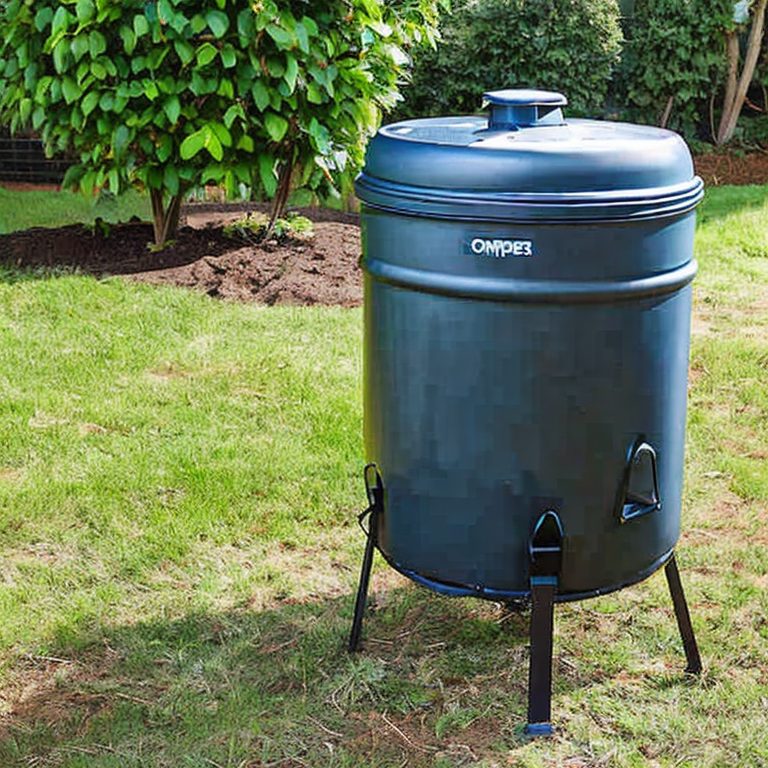
a. Container: The main structure that holds the compost. It should be sturdy, durable, and capable of rotating.
b. Aeration System: Allows proper airflow to facilitate the decomposition process.
c. Door/Opening: Provides access to add and remove compost materials.
d. Base/Foundation: Ensures stability and prevents direct contact with the ground, reducing the risk of pests and moisture damage.
2. Materials and Tools:
To build your compost tumbler, you’ll need the following materials and tools:
Materials:
– A food-grade 55-gallon drum or large plastic barrel with a removable lid
– Metal or wooden bars for the frame
– Hinges and latches for the door
– Screws or bolts
– Mesh or wire for aeration
– Brackets or sturdy legs for the base
Tools:
– Drill
– Saw
– Screwdriver or wrench
– Measuring tape
– Pliers
– Marker
3. Building the Compost Tumbler:
Now that we have a good understanding of compost tumblers and have gathered our materials and tools, let’s dive into the step-by-step process of building one:
Step 1: Preparing the Barrel
– Start by cleaning the barrel thoroughly to remove any residue or contaminants.
– Remove the barrel’s lid and set it aside as we’ll need it later.
Step 2: Creating Openings
– Measure and mark the desired location for the door on the barrel. The size can vary, but it should be large enough for easy access.
– Using a saw, carefully cut along the marked lines to create the door opening. Smooth the edges with sandpaper.
Step 3: Adding Aeration
– Measure and mark several evenly spaced spots around the barrel, leaving a few inches gap from the top and bottom.
– Using a drill with a hole saw attachment or a sharp blade, cut holes at each marked spot. Alternatively, you can create a pattern of small holes with a regular drill bit.
Step 4: Building the Frame
– Measure the height of the barrel and cut four bars accordingly to form the frame. These bars will act as supports for the barrel.
– Attach the bars to form a rectangular frame using screws or bolts. Ensure the frame is sturdy and can hold the weight of the barrel.
Step 5: Attaching the Barrel
– Place the barrel inside the frame, ensuring it rests securely.
– Attach the barrel to the frame using metal brackets or straps, ensuring it is tightly secured.
Step 6: Adding the Door
– Attach hinges to one side of the door opening on the barrel and the corresponding side on the barrel frame.
– Attach latches on the opposite side to keep the door closed securely.
Step 7: Creating the Base
– Cut four sturdy legs or use brackets to elevate the compost tumbler from the ground. This prevents moisture damage and allows for easy rotation.
4. Using Your Compost Tumbler:
Congratulations! You’ve successfully built your compost tumbler. Now, let’s look at some tips for using it effectively:
a. Filling the Tumbler:
– Add a balanced mix of green (nitrogen-rich) and brown (carbon-rich) materials, such as fruit and vegetable scraps, yard waste, leaves, and shredded paper.
– Avoid adding meat, dairy, oily/greasy items, or pet waste, as they can attract pests or introduce pathogens.
b. Turning the Tumbler:
– Rotate the tumbler at least once a week to aerate the compost and speed up the decomposition process.
– Aim for a good mix of moisture (like a wrung-out sponge) to maintain the ideal composting environment.
c. Harvesting the Compost:
– Once the compost is dark, crumbly, and earthy-smelling, it’s ready for use.
– Empty the compost through the door by rotating the tumbler to the desired position.
Conclusion:
Building your compost tumbler is an empowering and rewarding process. With your newly acquired knowledge, you can now enjoy the benefits of composting and contribute to a greener world. Remember to monitor and maintain your compost tumbler regularly for optimal results. Happy composting!
Turning Trash into Treasure: Navigating Compost Tumbler Troubles
When building a compost tumbler, there are several common and uncommon issues that you may encounter. Here, I will explain some of these issues along with solutions, tips, and advice to help you overcome them:
1. Insufficient aeration: Compost needs oxygen to decompose efficiently. If your compost tumbler lacks proper aeration, it can lead to slow decomposition and unpleasant odors. To solve this, ensure that your tumbler has enough ventilation holes or slots to allow for adequate airflow. Additionally, turn or rotate the tumbler regularly to introduce fresh air into the compost.
2. Improper moisture levels: Compost requires the right amount of moisture to break down effectively. If your compost becomes too dry, it will decompose slowly, and if it becomes too wet, it may start to smell or develop anaerobic conditions. To maintain ideal moisture levels, regularly check the moisture content and adjust by adding water or dry materials as needed. Aim for a moisture level similar to a wrung-out sponge.
3. Slow decomposition: If your compost is taking longer to decompose than expected, it could be due to a lack of nitrogen-rich (green) materials or an imbalance in the carbon-to-nitrogen ratio (C:N ratio). Ensure you have a mix of both green (e.g., kitchen scraps, grass clippings) and brown (e.g., dry leaves, straw) materials in the right proportions. Aim for a C:N ratio of around 25-30:1 to provide an optimal environment for decomposition.
4. Foul odors: Foul smells emanating from your compost can be a sign of poor aeration, excessive moisture, or an imbalance of materials. To address this issue, make sure your compost has enough airflow, adjust moisture levels, and ensure a balanced mix of green and brown materials. Avoid adding meat, dairy, or oily items that can attract pests and cause odors.
5. Pest infestation: Compost can attract pests like rodents, flies, or ants, especially if you add food scraps that haven’t decomposed properly. To prevent infestations, avoid adding meat, dairy, or oily food waste. Burying fresh kitchen scraps under existing compost layers can also help deter pests. You can also consider using a tumbler with a secure lid and a sturdy construction to discourage pests.
6. Tumbler maintenance: Over time, compost tumblers may require maintenance, such as lubricating the hinges, checking for rust or corrosion, or replacing worn-out parts. Regularly inspect your compost tumbler and address any maintenance needs promptly to ensure its longevity and functionality.
7. Unusual plant material: Sometimes, you may encounter unexpected items in your compost, such as diseased plant material or invasive weeds. To prevent the spread of diseases or invasive species, avoid adding these materials to your compost tumbler. Instead, dispose of them separately or through municipal green waste programs.
Remember, building and maintaining a compost tumbler is an ongoing process of experimentation and adjustment. It’s essential to monitor your compost regularly, make necessary modifications, and be patient as the decomposition process takes time. With the right care and attention, your compost tumbler can provide you with nutrient-rich compost for your garden while minimizing waste.
Spin Your Way to Sustainable Gardening with a Compost Tumbler!
For advanced users who are already experts in building a compost tumbler, there are several exciting projects that can be taken on to further enhance their composting experience. Here are a few suggestions:
1. Worm Composting System: Expand your composting capabilities by building a worm composting system, also known as vermicomposting. Worms can turn kitchen scraps and other organic materials into nutrient-rich vermicompost, which is highly beneficial for plants. Design a multi-tiered worm bin using stacked plastic bins or wooden boxes. Ensure proper ventilation and drainage, and add bedding material such as shredded newspaper or coconut coir. Introduce red worms and start feeding them with kitchen waste. Regularly harvest the vermicompost and use it in your garden.
2. Compost Tea Brewer: Compost tea is a liquid fertilizer made by steeping compost in water. It provides a concentrated dose of beneficial microorganisms and nutrients for plants. Construct a compost tea brewer using a large container, an aeration system (such as an aquarium pump), and a mesh bag or filter to hold the compost. Fill the container with water, add compost, and aerate the mixture for 24-48 hours. Strain the liquid and use it to water your plants or apply it as a foliar spray.
3. Hot Composting System: If you want to speed up the composting process and efficiently break down organic materials, consider building a hot composting system. This method requires a larger composting area and careful management of carbon-to-nitrogen ratios, moisture levels, and turning frequency. Construct multiple compost bays using wooden pallets or wire mesh. Layer green (nitrogen-rich) and brown (carbon-rich) materials, ensuring proper moisture and aeration. Monitor the internal temperature regularly and turn the pile every few days to maintain optimal conditions for decomposition.
4. Compost Sifter: To obtain a fine, uniform compost product, build a compost sifter. This device allows you to separate larger, uncomposted materials from the finished compost. Construct a frame using wood or PVC pipes, and attach a mesh screen or hardware cloth to create a sieve. Shovel the compost onto the screen and shake or agitate it to sift out the larger particles. Collect the sifted compost and return any uncomposted materials back to the compost pile.
When taking on these advanced projects, keep in mind the principles of composting: proper aeration, moisture control, and the right balance of carbon and nitrogen materials. Experiment with different techniques and monitor the progress of your compost to refine your methods and achieve the best results. Enjoy the journey of mastering the art of composting and sharing your knowledge with others!
Tags: backyard, build, compostbin, composttumbler, composting, decompose, DIY, eco-friendly, environment, gardening, gardeningtips, greenliving, homemade, nutrients, organic, recycling, Soil, sustainability, turning, wastemanagement
Tweet