Unleash Your Inner Caveman: Build an Earth Oven Today
An earth oven, also known as a clay or cob oven, is a traditional way of cooking food that has been used for centuries. It is a simple, low-cost, and efficient way of cooking that does not require any electricity or gas. In this guide, we will go through the step-by-step process of making an earth oven.
Step 1: Choose a Location
The first step in making an earth oven is to choose a suitable location. The location should be flat and free of any flammable materials. It should also be close to a source of water and firewood.
Step 2: Gather Materials
The next step is to gather the materials you will need to make the oven. These include:
– Sand
– Clay or Cob (a mixture of clay, sand, and straw)
– Firebricks or stones
– Straw or other organic materials
Step 3: Build the Base
The base of the oven is the foundation upon which the rest of the oven will be built. To build the base, dig a shallow pit that is about 2-3 feet deep and about 4-5 feet in diameter. Fill the pit with gravel or small stones to create a stable base. Next, create a form using bricks or stones to create a level surface for the oven floor.
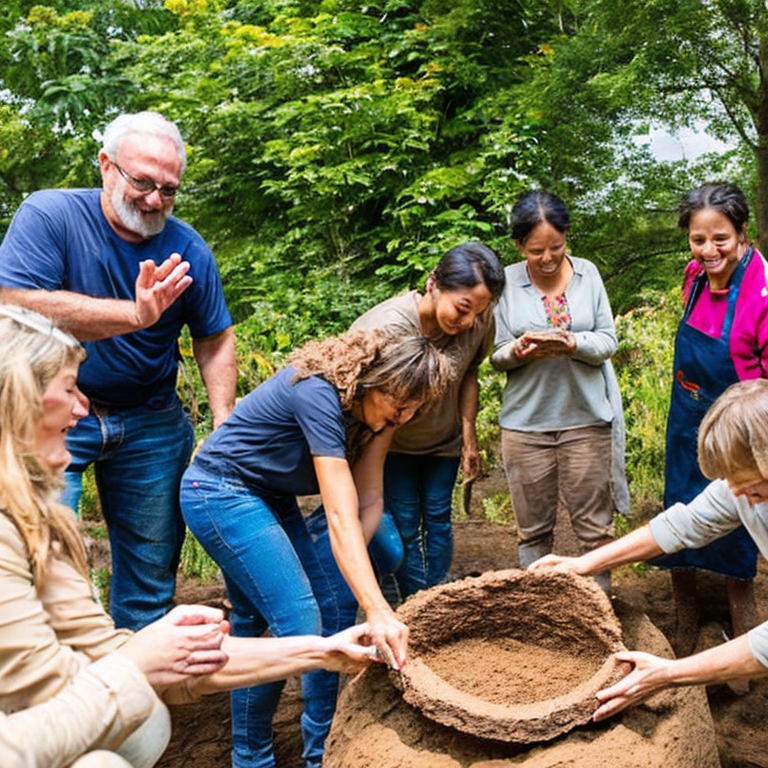
Step 4: Build the Oven Dome
The oven dome is the most important part of the oven. It is the part that will hold the heat and cook the food. To build the dome, create a mixture of clay or cob and sand. The ratio of clay to sand should be about 1:3. Mix the clay and sand together until you have a smooth, even mixture.
Next, start building the oven dome by shaping the mixture into small bricks or balls. Begin at the base of the dome and work your way up, laying each brick or ball in a circular pattern until you have formed a dome. As you build, make sure to leave a small opening at the top for the smoke to escape.
Step 5: Add Insulation
After the dome is built, it is important to add insulation to keep the heat inside the oven. To do this, cover the dome with a layer of wet straw or other organic materials. This will help keep the heat inside the oven and prevent it from escaping.
Step 6: Add the Oven Door
The final step is to add the oven door. To do this, create a small opening in the side of the dome and build a small arch over the opening using firebricks or stones. This will create a small doorway for you to add and remove food from the oven.
Step 7: Curing the Oven
Before using the oven, it is important to cure it. This means heating the oven to a high temperature to dry out the clay or cob mixture and harden it. To do this, start a small fire in the oven and gradually increase the temperature over the course of a few days until it reaches about 500-600 degrees Fahrenheit.
Conclusion:
Making an earth oven is a simple and rewarding process that can provide you with a unique and efficient way of cooking food. With these steps, you can create a traditional oven that will last for years and provide you with delicious meals cooked using only natural heat.
From Dough to Disasters: The Earth Oven Experience
When making an earth oven, there are several common and uncommon issues that one may encounter. Here are some of these issues and their corresponding solutions, tips, and advice:
1. Uneven heating: This is a common issue with earth ovens, where the heat is not distributed evenly throughout the oven. To solve this, make sure that the oven is properly insulated, and that the fire is built in the center of the oven. You can also rotate the food as it cooks to ensure even heating.
2. Cracking: Cracking can occur when the clay or other materials used in the oven are not properly mixed or are too dry. To prevent cracking, make sure to mix the clay with enough water to make it pliable, and add straw or other fibers to strengthen the oven.
3. Excessive smoke: This can happen if the fire is not burning hot enough or if there is not enough ventilation in the oven. To reduce smoke, make sure to build a hot fire before cooking, and ensure that the chimney or vent is clear and unobstructed.
4. Insufficient heat: If the oven is not getting hot enough, it may be due to insufficient fuel or poor insulation. To increase heat, add more fuel to the fire, or consider adding another layer of insulation to the oven.
5. Uneven baking: Uneven baking can occur if the food is not placed in the right location in the oven or if the oven is not hot enough. To ensure even baking, place the food in the center of the oven and make sure the fire is burning hot enough.
6. Burnt food: Burnt food can happen if the fire is too hot or if the food is left in the oven for too long. To prevent burnt food, make sure to keep an eye on the food as it cooks, and adjust the heat as needed.
7. Insects or pests: Insects and pests can be attracted to the food or the oven itself. To prevent insects and pests, store food in airtight containers and clean the oven regularly.
8. Difficulty starting the fire: Starting the fire can be difficult if the wood is too wet or if there is not enough kindling. To start the fire, use dry kindling and small pieces of wood, and make sure to build the fire in the center of the oven.
Overall, making an earth oven can be a fun and rewarding experience. By following these tips and advice, you can ensure that your oven works properly and produces delicious food.
Create Culinary Delights with Your Own DIY Earth Oven
Great question! For advanced users who have already mastered the skill of building an earth oven, there are a number of exciting projects that can be pursued. Here are a few ideas:
1. Build a cob house – Cob is a natural building material made from a mixture of clay, sand, and straw. It can be sculpted into any shape and is ideal for building small, sustainable homes. If you already know how to make an earth oven, you likely have some experience working with cob. Building a cob house is a logical next step for those who want to take their natural building skills to the next level.
2. Construct a rocket stove – A rocket stove is a highly efficient and sustainable cooking stove that can be made from a variety of materials, including clay, brick, or metal. Rocket stoves are designed to burn small amounts of wood or other biomass fuel, producing a hot, clean flame that can be used for cooking, heating, or even generating electricity. If you’re interested in sustainable living and energy independence, building a rocket stove is a great project to tackle.
3. Create a permaculture garden – Permaculture is a design system that integrates sustainable agriculture, ecology, and social systems. A permaculture garden is designed to be self-sustaining, with a focus on biodiversity, soil health, and water conservation. If you already know how to make an earth oven, you likely have some experience working with natural materials and understanding the principles of sustainability. Creating a permaculture garden is a great way to put those skills to use.
4. Build a natural swimming pool – A natural swimming pool is a chemical-free swimming pool that is designed to blend in with the natural landscape. These pools use plants and natural filtration systems to keep the water clean and clear. If you’re interested in natural building and sustainable living, building a natural swimming pool is a great project to undertake.
My advice to advanced users who are already experts in making an earth oven is to continue to learn and experiment with new materials and techniques. Don’t be afraid to take on challenging projects, and always be willing to learn from your mistakes. Remember that natural building is a lifelong learning process, and there is always more to discover and explore. Good luck!
Tags: artisanbread, backyardoven, clayoven, cobconstruction, DIY, earthoven, earthenoven, eco-friendlyliving, homesteading, naturalbuilding, off-gridliving, organicbaking, outdoorcooking, permaculture, pizzaoven, self-sufficientliving, sustainableliving, traditionalcooking, wood-firedcooking, wood-firedoven
Tweet