Snowman: The Ultimate Winter DIY Project
Making a snowman is a fun winter activity that can be enjoyed by people of all ages. To make a snowman, you will need snow and some basic materials. Here is a step-by-step guide to making a snowman:
1. First, you need to find a suitable location with enough snow to make a snowman. A flat and open area is ideal, and the snow should be wet and packable.
2. Make a snowball by packing snow into a ball. Start by grabbing a handful of snow and squeezing it tightly in your hands. Keep adding more snow and packing it together until you have a ball that is about the size of a basketball.
3. Roll the snowball along the ground to make it larger. Start by rolling the snowball in a straight line, then turn it and roll it in a different direction. Keep rolling the snowball until it is about twice the size of the first ball.
4. Repeat steps 2 and 3 to create two more snowballs, each one slightly smaller than the one before.
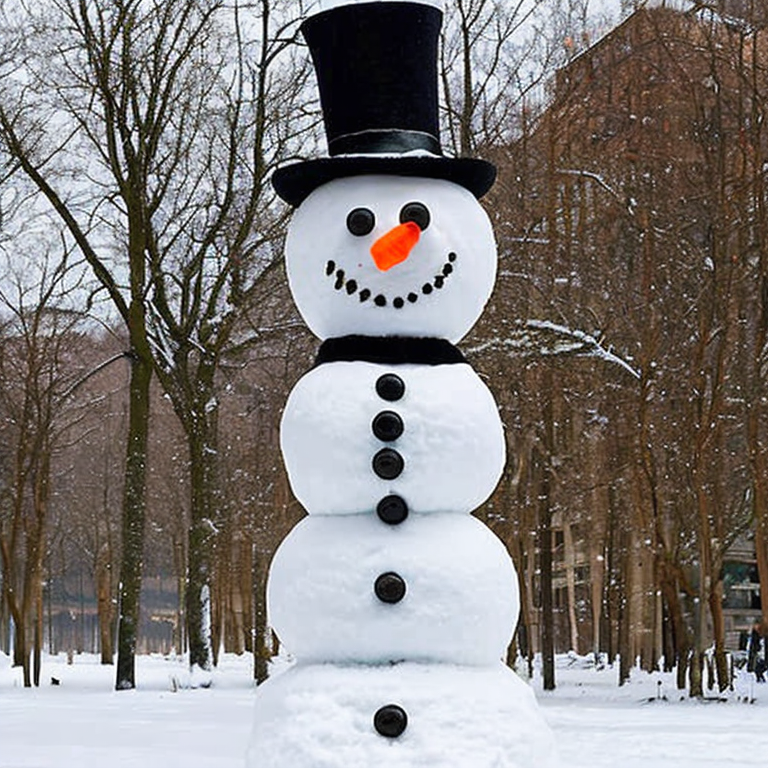
5. Stack the snowballs on top of each other, starting with the largest one at the bottom. You can use a shovel or your hands to carefully lift and place each snowball on top of the other.
6. Once you have stacked all three snowballs, it’s time to decorate your snowman. Use sticks for arms, rocks or coal for eyes, and a carrot for the nose. You can also use a hat or scarf to give your snowman some personality.
7. Finally, step back and admire your creation! Your snowman is now complete and ready to bring joy to all who see it.
Remember, making a snowman can be a great way to spend time outdoors during the winter months. Be sure to dress warmly and have fun!
Snowman-Making Woes? Here’s What You’re Doing Wrong
When making a snowman, there are several common and uncommon issues that may arise. Here are some of them and their solutions:
1. The snow won’t stick together: This is a common issue, especially if the snow is too dry or powdery. To solve this problem, try packing the snow more tightly or adding a bit of water to moisten it.
2. The snowman is lopsided: This can happen if the snowman is built on an uneven surface or if the snow is not distributed evenly. To fix this, try packing more snow onto the lower side of the snowman or removing some from the higher side.
3. The snowman is too small: If you want to make a larger snowman but don’t have enough snow, try gathering snow from other areas and packing it onto the snowman.
4. The snowman is melting: This can happen if the temperature rises or if the sun is shining directly on the snowman. To prevent this, try building the snowman in a shady area or spraying it with a water mist to create a protective layer of ice.
5. The snowman is too plain: To make your snowman more interesting, try adding accessories like a hat, scarf, buttons or even a carrot nose. You can also use food coloring to dye the snow or add decorations like twigs or stones.
6. The snowman is falling apart: This can happen if the snowman is not packed tightly enough or if it is too heavy on the top. To prevent this, try packing the snow more tightly or adding a support structure like sticks or wire to hold the snowman together.
In general, when making a snowman, it’s important to use the right type of snow and to pack it tightly to create a sturdy structure. Adding water or spraying with a water mist can also help to create a protective layer of ice. Finally, don’t be afraid to get creative and add your own unique touches to make your snowman stand out!
Level up your snow game: Master the art of snowmen
If the reader is already an expert in making a snowman, there are several other snow-related projects that they can try. Here are a few ideas:
1. Snow sculptures: Instead of making a traditional snowman, why not create a snow sculpture of your favorite animal, character or even a famous landmark? To create a snow sculpture, start by packing snow into a large mound and then use tools like shovels, spoons, and even toothbrushes to shape the snow into your desired form.
2. Snow forts: If you’re looking for a more interactive snow project, consider building a snow fort or castle. To build a snow fort, start by packing snow into large blocks and then stacking them to create walls. You can then use a shovel or other tool to create a doorway and windows.
3. Snow slides: If you have a hill in your backyard, consider building a snow slide. To create a snow slide, pack snow into a long, narrow track and then use a shovel to smooth out the surface. You can then create a ramp at the end of the track to launch yourself into the air.
4. Snow painting: If you’re feeling creative, consider painting your snow creations. You can use spray bottles filled with water and food coloring to paint your snow sculptures or even create a colorful snow mural.
Remember to always be safe when working with snow and to dress warmly as you work on your projects. Happy snow crafting!
Tags: buttons, carrotnose, crafting, creative, decorations, DIY, Family, frosty, fun, hat, holiday, kids, mittens, OutdoorActivities, scarf, snow, snowball, snowman, tutorial, winter
Tweet